




• Free shipping
  • 5-year warranty
  • Fast delivery

How do you soundproof a floor?

Soundproofing a floor is a practical measure when sound travels between floors, when footfall noise disturbs the room below, or when vibrations from movement, furniture, or equipment spread throughout the building. A floor often functions as part of the overall structure, which means that sound does not simply pass straight through the surface. It can also travel through joists, wall connections, joints, and hard contact points. Therefore, it is important to consider sound absorption, sealing, mass, and decoupling.

The first step is to determine which type of sound is most disruptive. Impact sound and structure-borne sound occur when vibrations are transmitted into the floor—for example, from footsteps, dropped objects, exercise machines, or furniture being dragged across the floor surface. Airborne sound is sound that travels through the air—such as voices, music, or TV noise—and then passes through the floor structure. These two issues can occur simultaneously, but they require somewhat different solutions.

For impact noise, the floor needs a damping intermediate layer that reduces vibrations before they are transmitted further. For airborne sound, the structure also needs to be denser and heavier, since mass and density dampen sound transmission more effectively than soft materials alone. A common misconception is that a soft rug or a simple foam mat automatically soundproofs the floor. It can reduce some of the “hollow” sensation and provide better comfort, but it does not typically stop sound from traveling between floors on its own.

Before you begin, the existing floor should be inspected thoroughly. Look for cracks, gaps, joints, and seams where sound can pass through. Pay special attention to the connection between the floor and the wall, penetrations, and any gaps at thresholds. A suitable sealant, installation adhesive, or sealing tape can make a big difference, as even small gaps can reduce the overall effectiveness. A completely soundproof floor is difficult to achieve, but a well-planned construction can significantly reduce sound transmission.

SilentDirect recommends two main options for flooring depending on your goals and sound issues. The most effective method involves an existing subfloor, a full-coverage layer of SilentDirect Polaric or SilentDirect MLV, a sound-absorbing layer of SilentDirect Neo, and then a new floor. The budget option primarily uses SilentDirect Neo under a new floor and is suitable when the main goal is to reduce impact noise and create a more comfortable floor.

Regardless of the method, proper installation is crucial. The materials must lie flat, seams must be sealed, and edges should be treated to prevent sound from escaping through the layers. If a click-lock flooring system is to be installed directly on top of SilentDirect Neo, a thickness of 4 mm or a maximum of 7 mm is recommended to prevent the floor from feeling too soft. If you first install floorboard, particleboard, or another stable panel on top of the sound-absorbing material, the structure can be made more robust.

Recommended Products

Key principles for a quieter floor.

  • First, identify the type of sound. Impact sound, structure-borne sound, and airborne sound require different balances between damping, mass, and sealing.
  • Seal joints and edges. Small gaps can allow sound to pass through and reduce the effectiveness of even high-quality materials.
  • Install a continuous covering. Sound-insulating and sound-absorbing layers work best when they cover the entire floor surface without interruption.
  • Avoid rigid contact points. Hard, direct contact between materials can transmit vibrations throughout the structure.
  • Adjust the installation height. Effective flooring solutions often require more space than thin comfort underlays.
  • Choose the right Neo thickness. For click-lock flooring installed directly on top, we recommend 4 mm or a maximum of 7 mm of SilentDirect Neo.
  • Use mass for airborne sound. When voices, music, or noise from neighbors travel through the floor, a heavier barrier is often needed.
  • Expect an improvement, not absolute silence. A completely soundproof floor is difficult to achieve, but the right combination can significantly reduce disturbances.

Soundproofing of an Existing Floor

Soundproofing a floor often involves reducing impact noise, vibrations, and structure-borne noise, but in some cases also airborne noise such as voices, music, or noise from neighbors. For best results, you need to choose the right system depending on whether the problem stems primarily from impact and vibrations or from noise that travels through the floor structure itself.

Before starting the work, you should inspect the floor thoroughly. Look for cracks, gaps, loose boards, open joints, and leaky connections to walls. Seal these areas before installing the sound-absorbing layers, as even small leaks can compromise the final result. A completely soundproof floor is difficult to achieve, but the right combination of sealing, underlayment, and sound-dampening layers can result in a noticeably quieter floor.

Option 1 - The Most Effective Method for Soundproofing a Floor

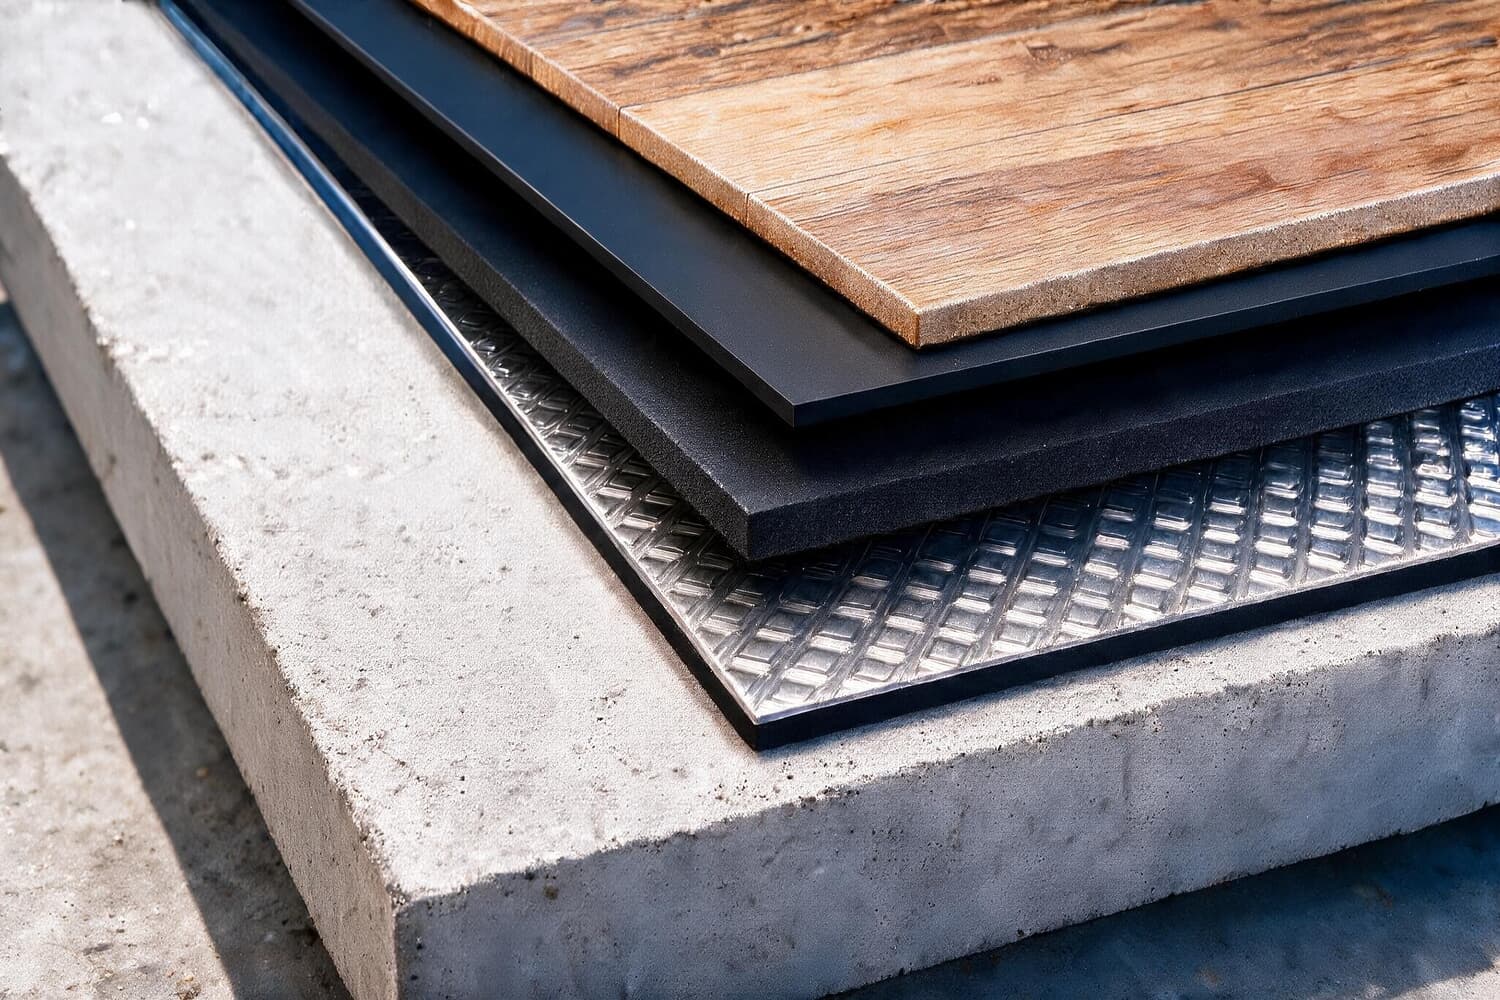
This option is ideal when you want the most comprehensive solution. The method combines vibration damping, sealing, a sound barrier, and a damping intermediate layer before the new floor is installed. The layer sequence is: existing floor, SilentDirect Polaric or SilentDirect MLV, SilentDirect Neo in 4 mm or a maximum of 7 mm for direct installation under a click-lock floor, and then the new floor.

Step 1 – Start with the existing floor

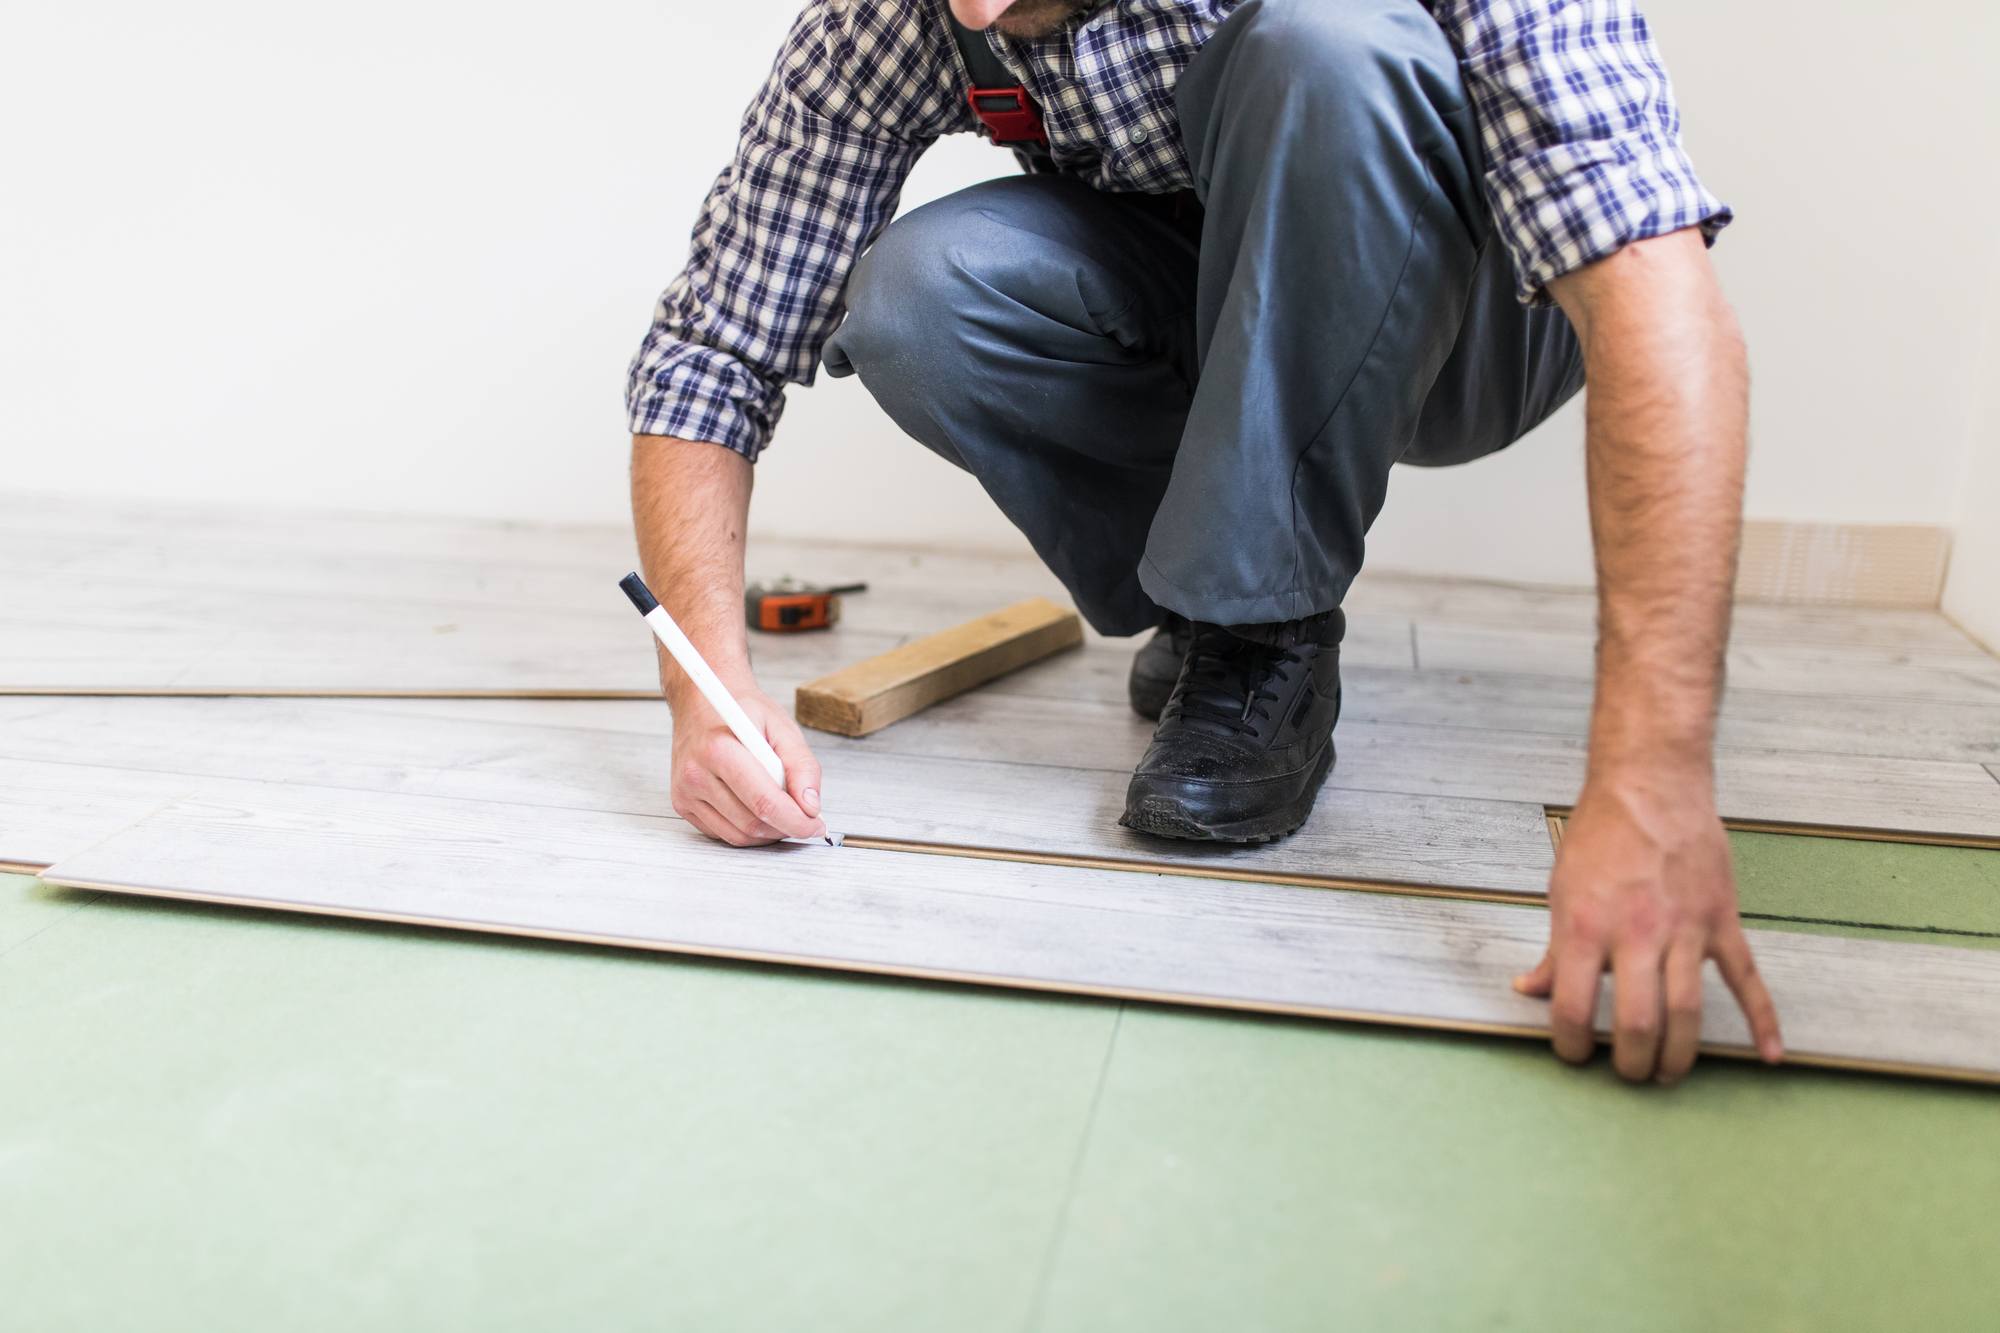
First, check that the floor is stable, clean, and level. Remove any loose material and ensure that the subfloor is dry before installing the sound insulation.
The existing floor serves as the base upon which the sound-absorbing and sound-insulating layers are built up.

Step 2 – Install SilentDirect Polaric or SilentDirect MLV over the entire floor

Install SilentDirect Polaric over the entire floor surface when your primary goal is to reduce vibrations, impact noise, and structure-borne noise in sturdier constructions.
This product is specifically designed to absorb and “dampen” vibrations in any surface it is installed on.
Therefore, always use Polaric as the first layer directly against the existing floor.

If airborne sound is also a significant problem—such as voices, music, or noise from neighbors transmitted through the floor— SilentDirect MLV can be used as a heavy sound barrier in the installation. This product also helps somewhat with vibrations, but it is primarily designed for airborne sound and acts as a barrier that prevents airborne sound from traveling further into the floor.

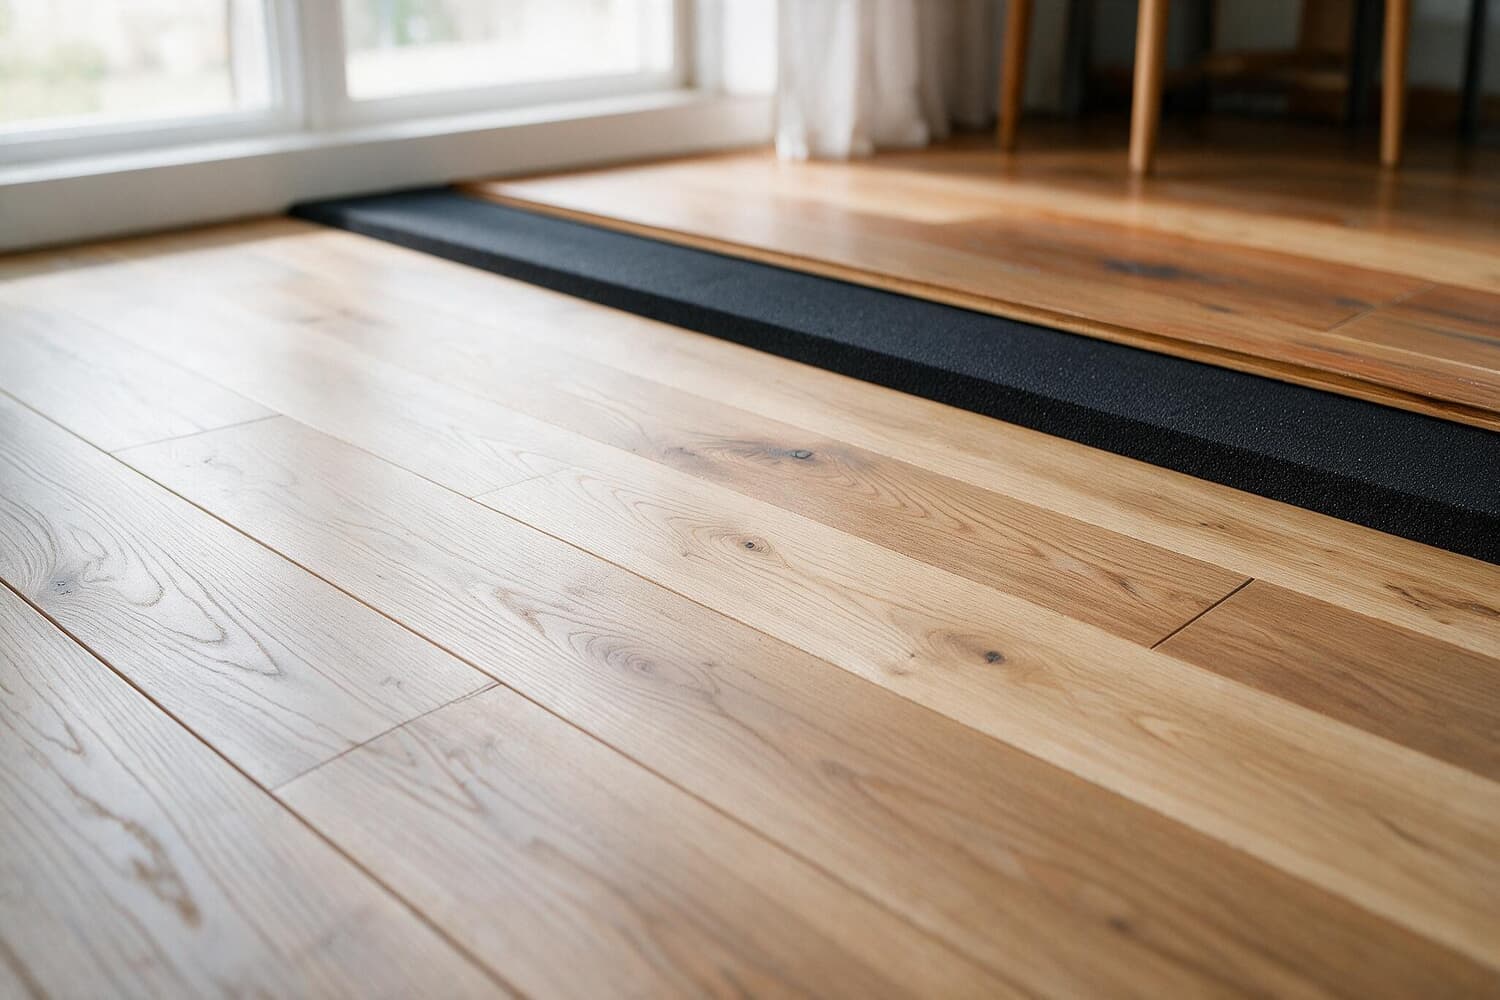
Make sure the material is laid evenly across the entire surface. Feel free to extend the layer 2 to 3 cm up the side walls when the construction allows it, as this reduces the risk of sound leakage at the floor edges.

For effective and optimal sound insulation against both problem areas, combine both products.

Step 3 – Seal Joints and Connections

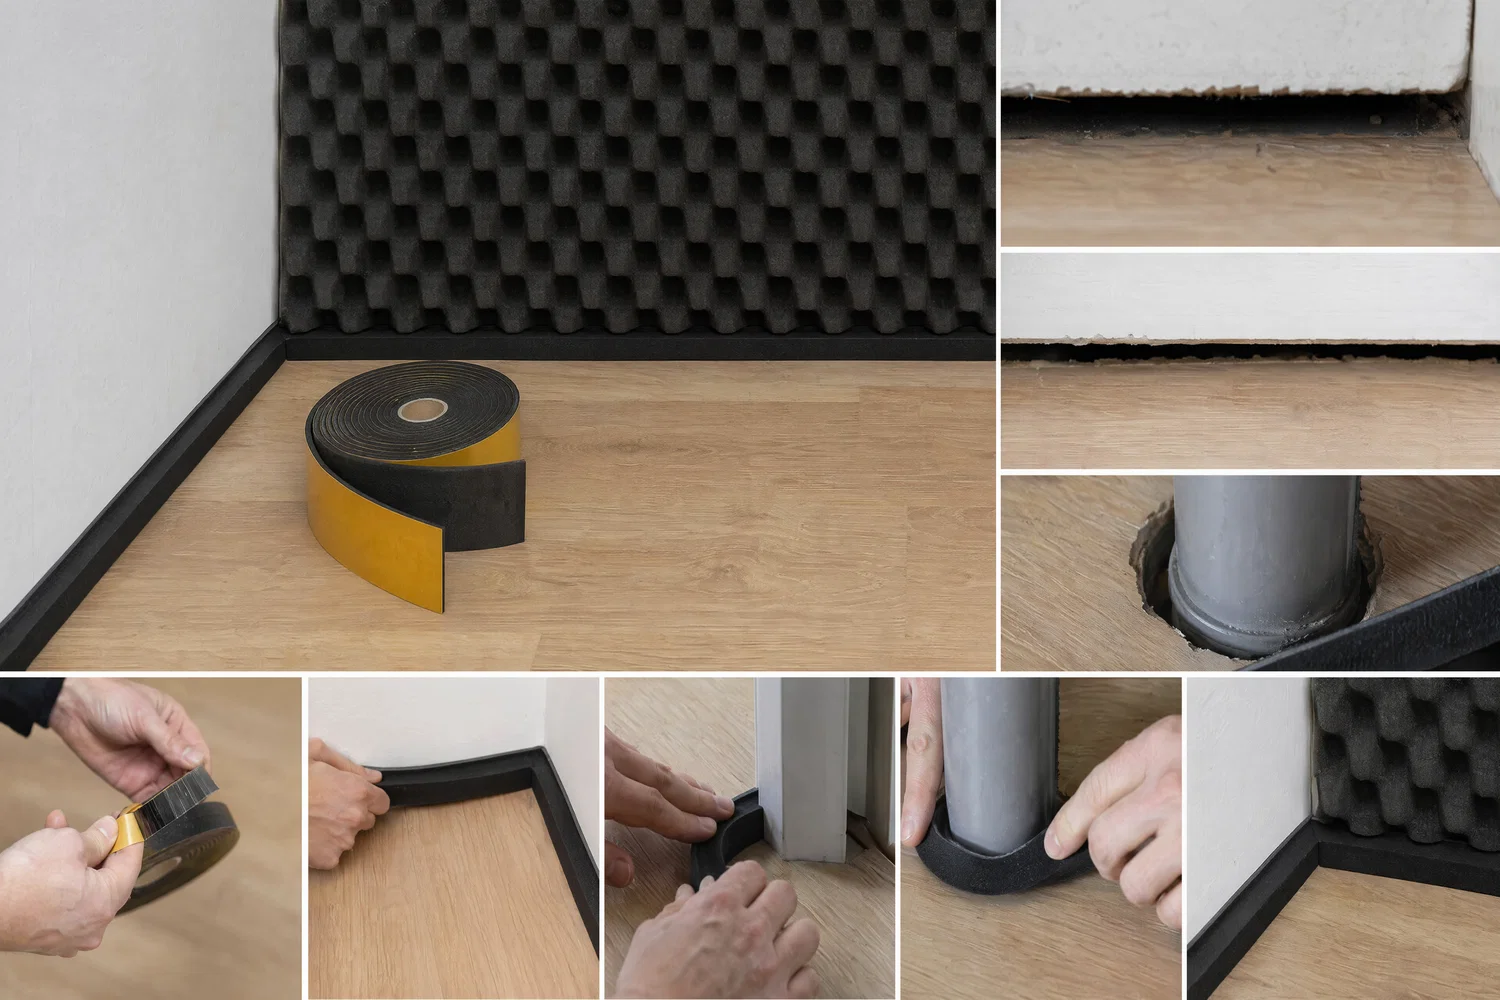
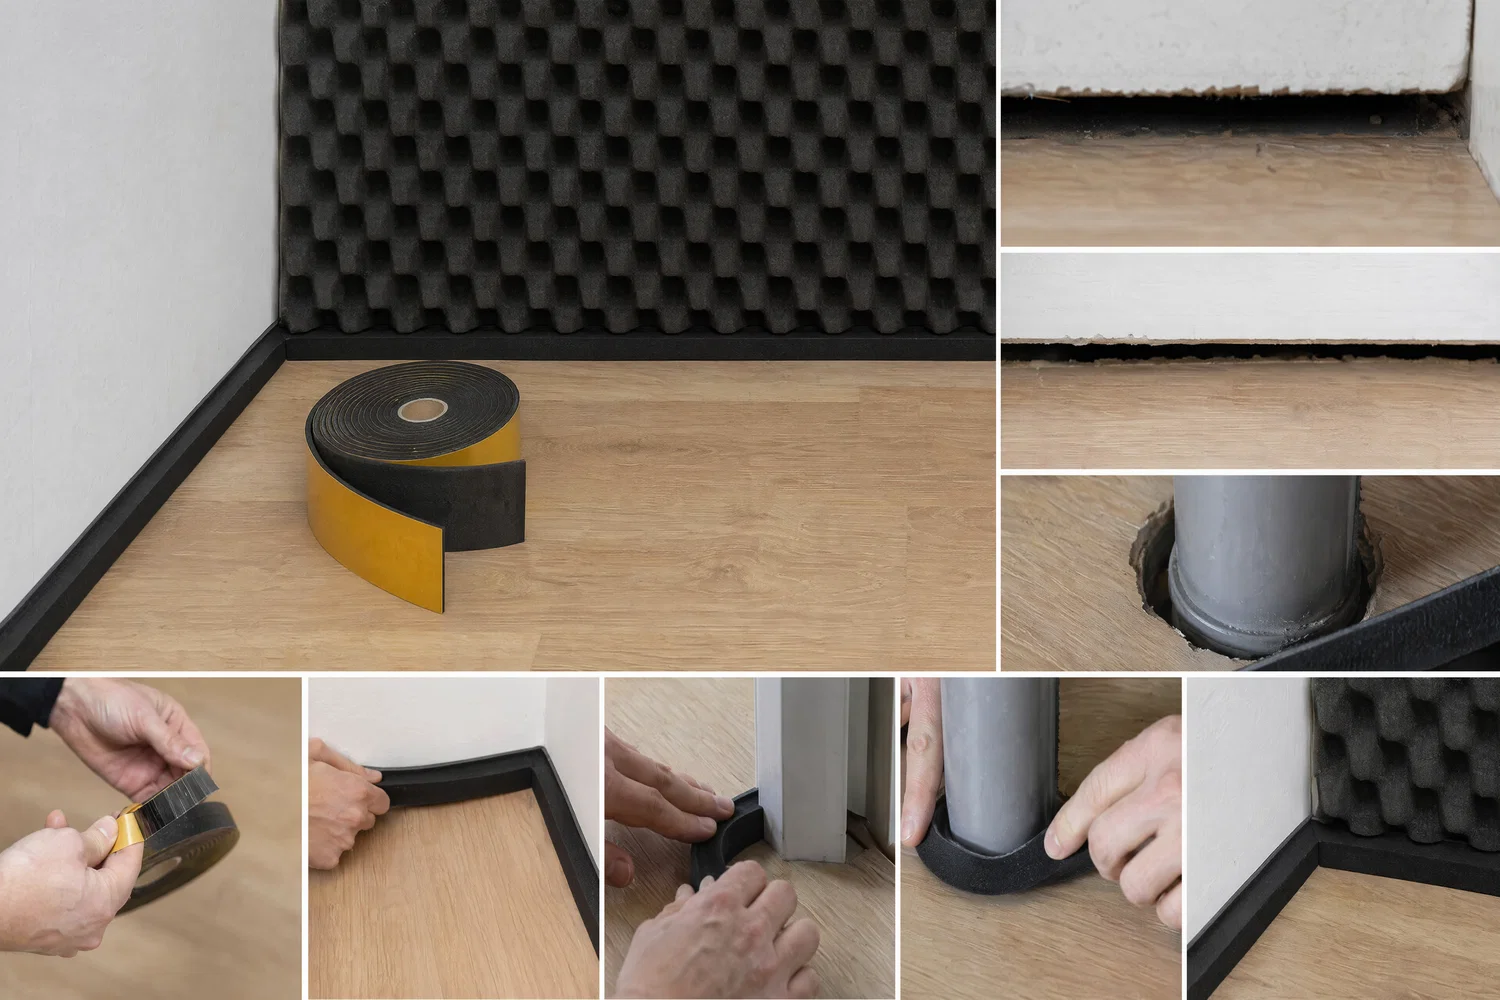
Carefully seal the joints with SilentDirect Aluminum Sealing Tape where it is compatible with the materials and construction. Joints, corners, and edge connections are critical points because sound often takes the easiest path past the insulation. Around the perimeter where the insulation meets the wall, we recommend using SilentDirect Seal instead, as this product provides a tighter seal than the aluminum tape. Also use a suitable sealant or mounting adhesive where the construction requires it.

Step 4 – Install SilentDirect Neo as a sound-dampening intermediate layer

Once the first layer is in place, cover the entire surface with SilentDirect Neo. If a click-lock flooring system is to be installed directly on top, we recommend a thickness of 4 mm or a maximum of 7 mm.
This provides a sound-absorbing layer without the floor typically feeling too soft or spongy.

If you first install floor gypsum, particleboard, or another stable panel on top of SilentDirect Neo, a thicker construction may work better, as the panel helps distribute the load and create a more even surface.

This step is especially important if you’re using MLV as the first layer, since MLV acts as a sound barrier that can amplify sound in the room where the solution is applied—as some of the sound now bounces back. A layer of Neo helps absorb this sound and prevents it from being amplified in the room.

Step 5 – Install the underlayment and new flooring

Before installing the new flooring, check the floor surface, seams, and edges one more time. Seal where necessary. Then install the new flooring.

Result: Option 1 provides the most comprehensive solution because it combines vibration damping, sealing, a sound barrier, and a damping intermediate layer.
It is particularly suitable when you want to reduce impact sound, structure-borne sound, and airborne sound transmitted through the floor.

Option 2 - Budget Option for Reducing Footfall Noise

This option is ideal when your primary goal is to reduce footfall noise and improve the comfort of the floor. It is a simpler and more cost-effective method, where the layering sequence is: existing floor, SilentDirect Neo in 4 mm or a maximum of 7 mm when installed directly under a click-lock floor, and then the new floor.

Step 1 – Inspect and Prepare the Subfloor

Make sure the floor is clean, dry, stable, and level before installing the material. Any unevenness should be corrected before laying the new layer. The subfloor affects both sound absorption and how the finished floor feels underfoot.

Step 2 – Install SilentDirect Neo over the entire floor

Cover the entire floor with SilentDirect Neo. The material is used as a sound-dampening intermediate layer to reduce footfall noise and vibrations between the existing floor and the new floor surface.

Make sure the material lies flat and that the seams are tight. If you’re covering larger areas, SilentDirect Neo on a roll can be convenient, as the roll format makes it easier to work over longer distances.

Step 3 – Install the subfloor or new flooring

Install the click-lock flooring directly on top of SilentDirect Neo, keeping the thickness between 4 mm and a maximum of 7 mm to reduce the risk of sagging.

Result: Option 2 is an affordable solution for reducing impact noise and certain vibrations.
It generally does not provide the same level of effectiveness against airborne sound as Option 1, but can be a good choice when you want to improve acoustic comfort with a thinner installation.

Decoupling and Sealing at Floor Joints

When working with sound insulation and vibration damping, one of the most important principles is to decouple materials from one another. If different building components are in direct contact with one another, vibrations, structure-borne sound, and sound energy can easily be transmitted through the structure.

To reduce this transmission, contact points and joints should be treated with care. SilentDirect Seal is a nitrile rubber sealing strip that can be used at gaps, joints, and contact surfaces where small air leaks or vibrations can compromise sound insulation. The product is installed where it is technically suitable for the structure and where it can contribute to tighter and more damped connections.

Supplementary Measures

Thick carpets, textiles, and sound-absorbing furnishings can reduce sound reflections and some sense of impact noise in the room, but they do not replace a proper sound-insulating floor system. If sound transmission occurs not only through the floor but also via walls, doors, or ceilings, these surfaces may need to be addressed separately.

Calculation software for floors and ceilings.

Calculation software for floors and ceilings.

If you're planning to soundproof a floor, it's important to calculate the area before ordering materials. The " Calculate the Size of Your Floor or Ceiling " page makes it easier to estimate the floor area to be covered and how much material is needed for a full-coverage installation.

Did you know that…

Did you know that small, unsealed joints can affect sound insulation more than you might think? Sound often takes the easiest path through a structure. That’s why sealing around edges, joints, and connections is an important part of the process when you want to reduce noise through a floor.

Selected Articles

Sealing strip. A tight seal is essential for sound insulation!

How can you reduce noise and minimize structure-borne noise?

Sound Insulation Cost Estimator

Products that are effective for soundproofing and sound-absorbing a floor

The products below are relevant when you want to build a quieter floor with a focus on impact sound, structure-borne sound, vibrations, sealing, and airborne sound. The best combination depends on whether you choose the more comprehensive floor system or a simpler, budget-friendly option for impact sound.

SilentDirect Polaric is a self-adhesive barrier mat with an aluminum surface that can be used in floor systems where hard surfaces, vibrations, and structure-borne noise need to be dampened. It is particularly suitable for the most effective solution.

SilentDirect MLV is a heavy mass-loaded vinyl barrier for constructions where high mass is needed to dampen airborne sound. It is suitable when the flooring issue also involves voices, music, or noise between floors.

SilentDirect Neo is used as a damping intermediate layer in the flooring system. For click-lock flooring installed directly on top, a thickness of 4 mm or a maximum of 7 mm is recommended to reduce the risk of the floor feeling too soft.

SilentDirect Neo roll is practical for larger floor areas, where the roll format makes it easier to cover longer distances with fewer breaks.

SilentDirect Aluminum Sealing Tape is used to seal joints in sound-insulating systems where leaks could compromise performance. It is particularly important when layers need to remain tight and continuous.

SilentDirect Seal is a self-adhesive sealing strip for gaps, joints, and contact surfaces where small air leaks or vibrations can compromise sound insulation. It can help decouple structures and create tighter connections.

Dampio PRO is useful when vibrations from machines, pumps, or equipment are transmitted down into the floor. The product is placed under the equipment and reduces the risk of structure-borne noise through hard surfaces.

SilentDirect Seal Door can serve as a supplementary seal when sound leaks through the gap between the door and the floor. It does not replace floor insulation, but can help when sound also travels through doorways.

*Free shipping

Free shipping to a pickup location

5-Year Warranty

5-Year Product Warranty

Fast Delivery

Usually ships the same day

How do you soundproof a floor?

Soundproofing a floor is an effective solution for reducing sound transmission between floors and creating a more harmonious and quiet indoor environment. Whether the goal is to dampen footfall noise, reduce vibrations from music equipment, or improve a room’s acoustics, there are various methods and materials that can be used to achieve optimal soundproofing.

Sound travels in two main ways—through the air (airborne sound) and through the building’s structure (structure-borne sound). Airborne sound occurs when sound waves travel through the air, while structure-borne sound is caused by vibrations in the building’s structure, such as from footsteps, moving furniture, or machinery. By installing sound-absorbing materials and using the right construction techniques, both of these types of sound can be minimized, creating a quieter and more comfortable environment.

A well-insulated floor is particularly important in apartment buildings, office environments, music studios, and public spaces where acoustic comfort plays a crucial role. By using specially designed sound-absorbing materials, such as SilentDirect Neo, SilentDirect Polaric, and SilentDirect MLV, you can effectively break up sound waves and prevent sound from traveling through the floor.

In addition to reducing noise levels, proper floor insulation can also contribute to improved energy efficiency and more comfortable temperature control. At the same time, it can help meet building codes and regulations for sound classification in buildings.

The Benefits of Soundproofing a Floor

Reduced transmission of footfall noise and vibrations
Soundproofing the floor effectively reduces noise from footsteps, moving furniture, and other movements that might otherwise disturb those on the floor below. This is particularly important in apartment buildings, offices, and hotels where a quiet environment is crucial for comfort.

Improved indoor acoustics and sound comfort
By using sound-absorbing materials, you can improve a room’s acoustics and reduce reverberation and resonance. This is a key factor in music studios, conference rooms, home theater systems, and other environments where sound quality plays a crucial role.

Increased comfort and well-being
A quieter indoor environment contributes to increased comfort, reduced stress, and a more relaxed atmosphere. By reducing noise levels, a more pleasant living and working environment is created for those in the room.

Better work environment and higher productivity
In office environments, soundproofing the floor can contribute to a quieter and more focused work environment. Reduced footfall noise and other disruptive sounds lead to increased concentration and higher productivity among employees.

Protection against external noise
A sound-insulated floor can also act as a barrieragainstexternal noise, such as traffic noise or neighbors’ activities. This is particularly beneficial in urban environments or in buildings where ambient noise easily penetrates.

Compliance with building codes and regulations
Many properties are subject to building codes andregulationsregarding sound insulation. By investing in the right sound insulation solution, you can ensure that your construction project meets these requirements and avoid potential penalties.

Improved Sleep Quality
Sound insulation in bedrooms can contribute to a quieter and more relaxed environment, leading to better sleep and increased well-being. By minimizing noise disturbances, you can create a more peaceful atmosphere that promotes a deeper and more undisturbed night’s sleep.