




• Free shipping
  • 5-year warranty
  • Fast delivery

Sound Insulation in Older Homes (Log/Board-and-Batten/Brick) – Tailored Methods

An older house should not be soundproofed using a one-size-fits-all solution, but rather based on the materials, condition, and connections of the existing structure. A solid log or brick wall may already have sufficient mass, but small gaps, leaky joints, mortar joints, floor joists, and penetrations can limit the effectiveness of the soundproofing. A board-and-batten wall, on the other hand, may require both greater mass and better decoupling.

Start by identifying the type of sound and the actual transmission path. Conversations, music, and traffic are primarily airborne sound. Footsteps, impacts, and vibrations are transmitted to a greater extent as structure-borne sound. Listen at several locations and compare the wall with doors, windows, floors, ceilings, electrical boxes, and pipe penetrations. If the sound is heard just as clearly at a joint, that may be where the first corrective action is needed.

Next, examine the structure. In log homes, pay attention to joints, cracks, warping, and the wall’s natural movement. In board-and-batten homes, check for gaps, loose layers, and how the boards connect to the joists. In brick houses, mortar joints, cracks, ventilation openings, and the condition of the fastenings are important. Moisture, rot, and loose joints must be addressed before the structure is enclosed.

Once the wall is stable and airtight, sound insulation can be installed using several complementary principles: a dense, heavy barrier against airborne sound; damping of vibration-sensitive surfaces; absorbent material within a cavity; and new, heavy wall cladding. A separate stud frame typically provides the best opportunity for decoupling, but thinner solutions are also available when floor space is limited.

Avoid creating rigid sound bridges between the old and new structures. Studs and panels in direct contact with the existing wall, floor, or ceiling can transmit vibrations. At the same time, ensure the entire structure is airtight, as even a small open joint can reduce the effectiveness of an otherwise heavy wall.

Older buildings may have been individually remodeled over several periods. Therefore, do not open up or install a structure based on assumptions. If there is uncertainty regarding load-bearing capacity, moisture, cultural-historical value, electrical installations, or appropriate fastening methods, the solution should be assessed by a qualified building professional.

Recommended products.

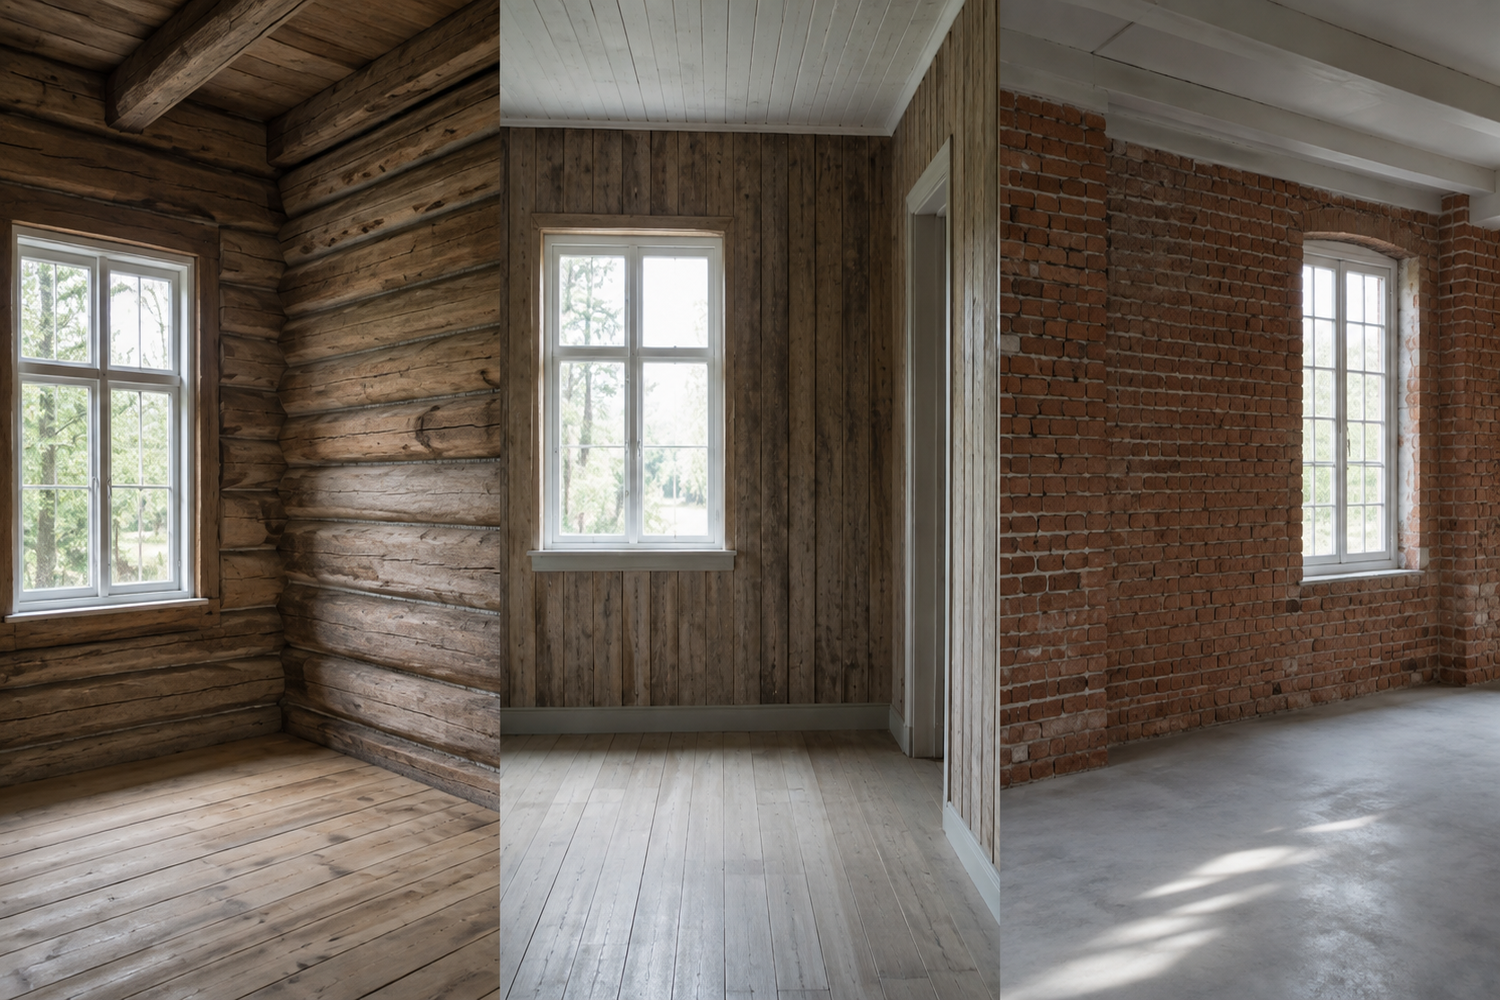
Key differences between lumber, planks, and brick:


First, determine the path of the sound

Check whether the sound is traveling through the main wall or via doors, windows, joists, ceilings, floors, and utilities. A new interior wall will be of limited use if a dominant secondary path is left untreated.

Wooden walls can move

Wooden walls may have cracks, loose joints, and older caulking. Sealing and connections must accommodate the structure’s condition and movements without locking the wall in an inappropriate position.

Plank walls may require more mass

An older plank wall may be thin, rigid, and permeable at the joints. A decoupled stud frame with cavity absorption and heavy panel cladding typically provides better performance than a single thin layer of paneling.

Brick has mass but not necessarily airtightness

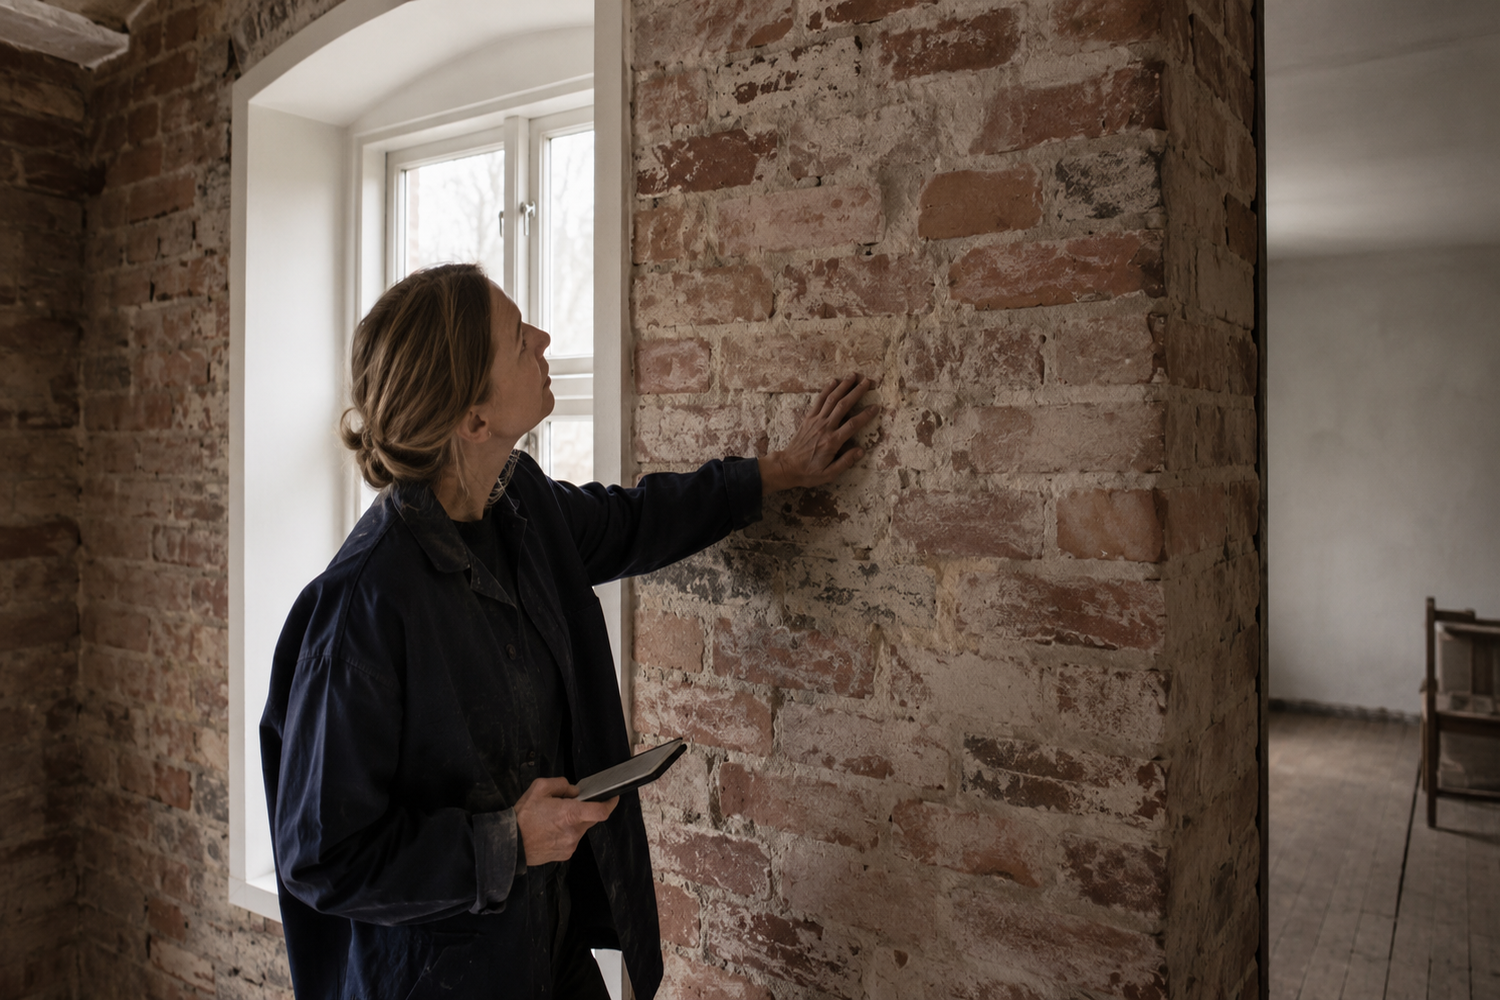
Solid brick often dampens airborne sound, but cracks, worn mortar joints, openings, and floor-to-wall connections can become weak points. Inspect the masonry before planning fasteners and new layers.

Seal before adding to the wall

Holes, penetrations, and open connections must be treated before they are concealed. Sound insulation must be continuous at corners and against floors and ceilings.

Decoupling limits vibration transmission

A separate stud frame reduces direct contact between the old and new walls. Damping layers at contact surfaces help limit sound bridges and structure-borne noise.

Moisture and structural condition take precedence over installation

Rot, moisture, loose joints, and unstable surface layers must not be incorporated into the structure. Also assess how a new interior structure will affect the function of the older wall.

Complete soundproofing is rarely realistic

The result depends on the entire room and the building’s structural framework. The goal is therefore a significant reduction in sound transmission through the right combination of sealing, mass, absorption, and decoupling.

Adapt the sound insulation to the older wall

Work methodically and let the existing wall guide the design details. Start by inspecting and sealing the wall. Then choose the one of the three construction methods that best suits the room’s dimensions, the type of noise, and the condition of the old frame.

Prepare the timber, planks, and brick properly

Lumber: Check for cracks, knots, warping, and connections to the floor joists. Keep in mind that the lumber may move, and avoid a new structure that locks the frame in an inappropriate way.

Planks: Check for gaps between planks, loose surface layers, and previous renovations. Generally plan for added mass and reduced direct contact between the old and new walls.

Brick: Check for cracks, mortar joints, plaster, penetrations, and the condition of the masonry. Adapt the fastening to the substrate and do not use loose or damaged bricks as unchecked fastening points.

Soundproofing an Existing Wall

Soundproofing an existing wall involves reducing sound transmission between rooms. For best results, you should combine several principles: decoupling, vibration damping, a sound barrier, sealing, and new, heavy wall cladding. The better the various layers are installed, the greater the effect will be.

Option 1 – The Best Solution for Wall Sound Insulation

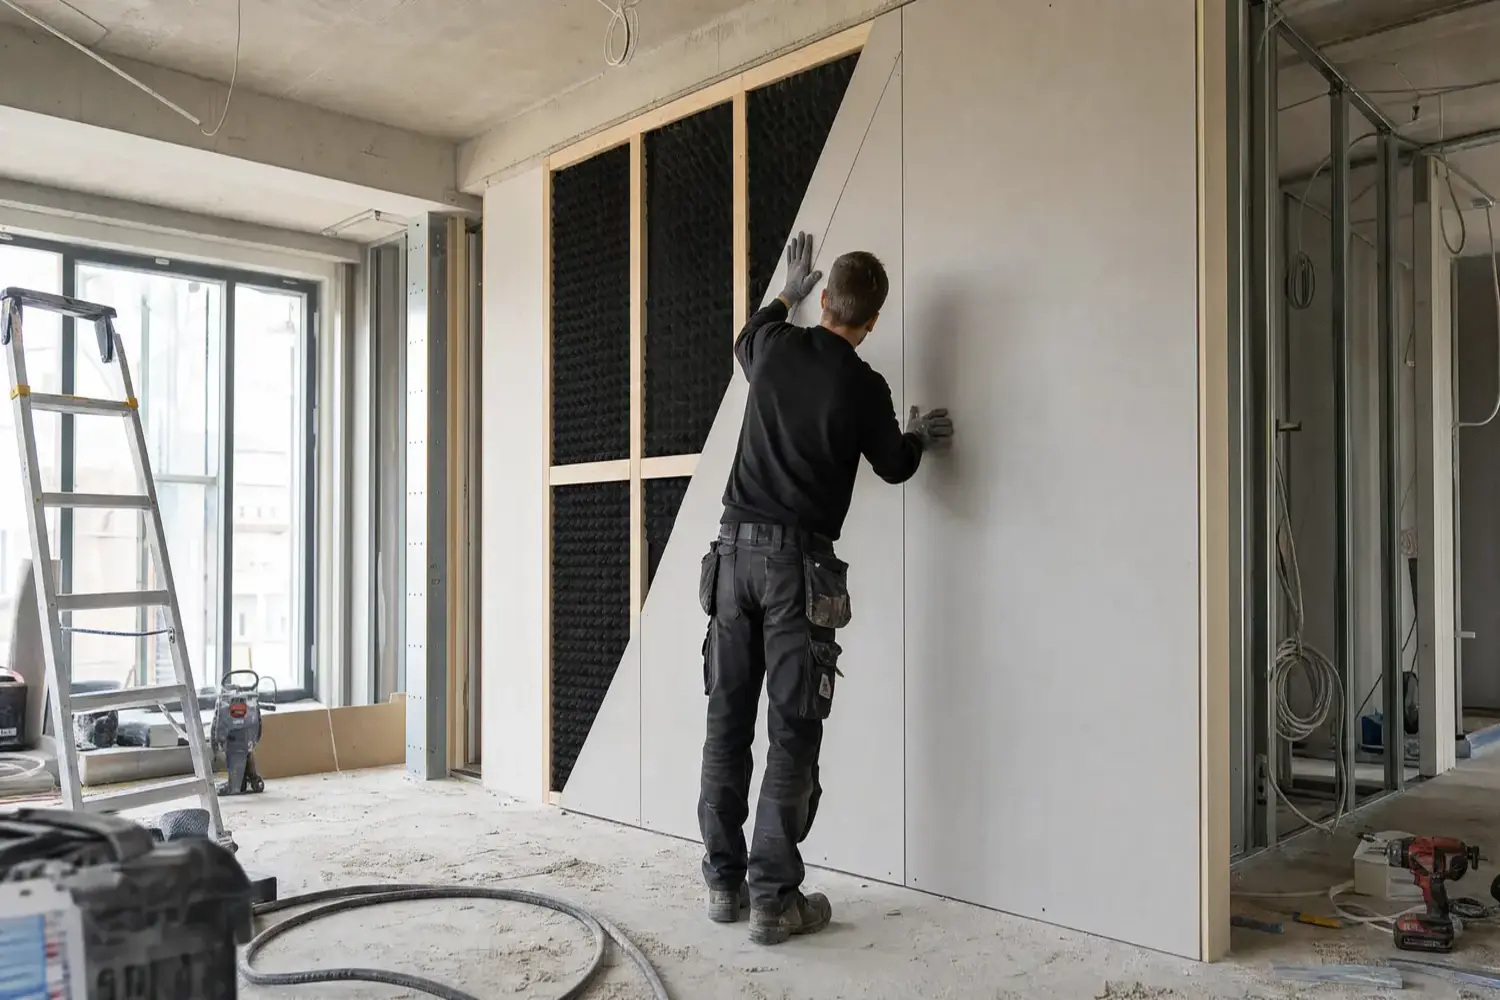
This is the solution we recommend when you want to achieve the best possible soundproofing. The method involves creating a new stud frame in front of the existing wall and reducing contact between the structures.

Step by step

1. Start with the existing wall
First, check that the wall is dry, stable, and free of loose material. Seal any large cracks or holes before beginning work.

2. Build a new stud frame in front of the wall
If you’re using studs, all parts of the stud that come into contact with other surfaces must be coated with SilentDirect Seal. This applies to surfaces that are in contact with the existing wall, floor, ceiling, and the new wall covering.

This is done to minimize direct contact between the building components and thereby reduce vibrations and structure-borne noise.

3. Fill the stud frame with SilentDirect Egg
Install SilentDirect Egg throughout the stud frame. The thicker the material, the better the sound-dampening effect in the cavity. We recommend a thickness of 35 mm or 50 mm.

SilentDirect Egg helps reduce resonances in the air gap and improves the structure’s overall sound insulation.

4. Cover the entire wall or stud frame with sound-insulating material
Cover the entire surface with either SilentDirect Polaric or SilentDirect MLV.

  • SilentDirect Polaric is effective for vibration damping and helps reduce structure-borne noise and vibrations in the structure.
  • SilentDirect MLV is particularly effective against airborne sound thanks to its high weight and dense structure.

Make sure the material covers the entire surface as thoroughly as possible.

5. Seal all seams thoroughly
Once Polaric or MLV is installed, all seams must be sealed with SilentDirect Aluminum Sealing Tape.

This is an important step because small openings, gaps, and unsealed joints can significantly reduce sound insulation.

6. Install the new wall
Finish by installing new wall cladding. We recommend:

  • Two layers of drywall.
  • One layer of OSB followed by one layer of drywall.
  • Another equivalent heavy and stable panel system.

For best results, panel joints should be staggered between the layers, and all edges should be carefully sealed.

Results
This option provides the most comprehensive solution, as the wall is constructed with decoupling, an absorbent material in the cavity, a sound barrier, sealing, and heavy new cladding.

Option 2 – Soundproofing a Wall Without a Stud Frame

This option is suitable when you want to improve sound insulation without installing a new stud frame. The solution involves working directly on the existing wall using multiple layers of sound-absorbing and sound-insulating materials.

Step by step

1. Start with the existing wall
Check that the wall is smooth, dry, and free of loose parts. Seal any holes, cracks, and penetrations before installing the materials.

2. Cover the entire wall with Polaric or MLV
Install SilentDirect Polaric or SilentDirect MLV over the entire wall surface.

  • Choose SilentDirect Polaric when you want to focus on vibration damping and reducing structure-borne noise.
  • Choose SilentDirect MLV when you want to create a heavy, dense sound barrier against airborne sound.

The material should be installed to cover as much of the surface as possible.

3. Seal all joints
Seal the joints with SilentDirect Aluminum Sealing Tape. Be thorough at overlaps, edges, corners, and penetrations.

A sealed surface is essential to prevent sound from leaking through small openings.

4. Install SilentDirect Neo over the surface
Next, cover the wall with SilentDirect Neo. We recommend a minimum thickness of 7 mm, but 15 mm provides better performance.

SilentDirect Neo helps reduce vibrations and creates a damping layer between the existing wall and the new wall covering.

5. Install the new wall
Finish with new wall cladding. We recommend:

  • Two layers of drywall.
  • One layer of OSB and one layer of drywall.
  • Other equivalent heavy-duty panel cladding.

Be sure to seal the joints where the wall meets the floor, ceiling, and side walls.

Results
This option provides a significant improvement without the need to build a stud frame. It is particularly useful when you want to save space but still build the wall with multiple sound-absorbing layers.

Option 3 – Budget Option for Wall Sound Insulation

This option is a simpler and more cost-effective way to improve sound insulation. The solution involves installing a sound-insulating layer and then creating a simple form of spacing between the existing wall and the new wall cladding.

Step by step

1. Start with the existing wall
Inspect the wall and seal any visible holes, cracks, and penetrations before beginning work.

2. Cover the entire wall with Polaric or MLV
Install SilentDirect Polaric or SilentDirect MLV over the entire wall surface.

  • SilentDirect Polaric is used when you want to reduce vibrations and structure-borne noise.
  • SilentDirect MLV is used when you want to create a dense, heavy barrier against airborne sound.

Ensure that the material is installed tightly and provides full coverage.

3. Seal the seams with aluminum tape
All seams must be sealed with SilentDirect Aluminum Sealing Tape.

This reduces the risk of sound leakage through joints and transitions.

4. Install SilentDirect Seal as spacer strips
Install SilentDirect Seal on top of Polaric or MLV, from floor to ceiling.

We recommend SilentDirect Seal that is 50 mm wide and 4 mm thick. The strips should be installed vertically, spaced approximately 20–30 cm apart.

The purpose is to ensure that the new wall does not rest directly against the existing wall. SilentDirect Seal acts as a damping intermediate layer and helps reduce vibrations between the surfaces.

5. Install the new wall
Finish with new wall cladding. We recommend:

  • Two layers of drywall.
  • One layer of OSB and one layer of drywall.
  • Other equivalent heavy-duty panel cladding.

Also seal the edges against the floor, ceiling, and side walls to reduce sound leakage.

Results
This is a simpler option that can provide a noticeable improvement, especially when you want to keep costs down. The effect is usually not as significant as with a decoupled stud frame, but this solution can be a good choice when space, budget, or construction possibilities are limited.

Important Considerations for Wall Sound Insulation

To ensure that sound insulation works as effectively as possible, proper sealing is very important. Sound easily travels through small gaps, joints, and openings. Therefore, you should always take great care with connections to floors, ceilings, corners, electrical boxes, and penetrations.

A new, heavy wall typically provides better sound insulation than a lightweight wall. For this reason, double layers of drywall or a combination of OSB and drywall are often recommended. For best results, the materials should be installed carefully, joints should be staggered, and all transitions should be sealed.

Check that the construction is truly airtight

The Light Test: Turn off the lights on one side of the wall and use a bright flashlight on the other. Visible light at edges, penetrations, or joints indicates a potential leak path that needs to be investigated and sealed.

The pressure test: Close doors and windows and create a slight pressure difference using existing ventilation or a fan. Run your hand or a thin strip of paper along joints and penetrations to detect drafts. Do not use an open flame.

When working with sound insulation and vibration damping, one of the most important principles is to decouple materials from one another. If different building components are in direct contact with each other, vibrations, structure-borne noise, and sound energy can easily be transmitted through the structure. This applies, for example, when constructing a stud frame for walls, ceilings, or floors.

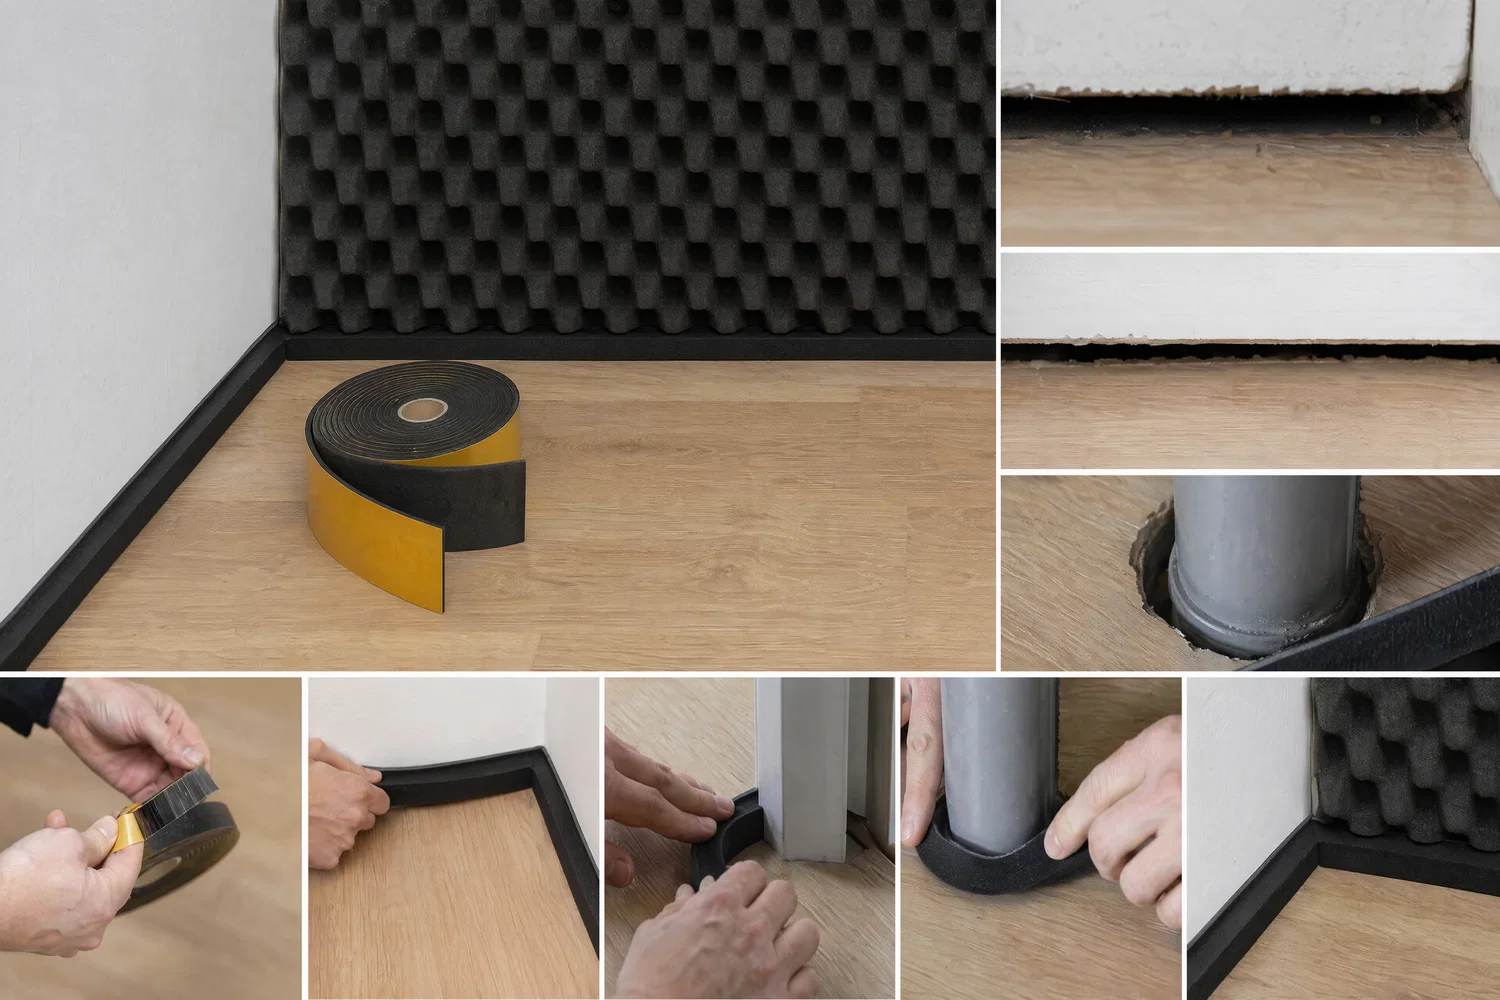
To reduce this transmission, the parts of the stud frame that come into contact with other surfaces should first be fitted with a vibration-damping layer. SilentDirect Seal is an effective option here. The product is a sealing strip made of nitrile rubber (NBR) and is designed to reduce sound leakage, dampen vibrations, and contribute to a tighter, quieter, and more energy-efficient structure.

SilentDirect Seal is placed between the stud and the surfaces it would otherwise be in direct contact with, such as the floor, ceiling, an existing wall, or a new wall structure. This creates a decoupling between the materials. The stud then has no direct contact with surrounding surfaces, which reduces the risk of vibrations and structure-borne noise being transmitted through the structure.

The result is more effective sound insulation, as both sound leakage and vibration transmission are limited. By using SilentDirect Seal at joints and contact points, you can create a more controlled structure where sound energy does not spread as easily. This makes the solution particularly useful for soundproofing walls, ceilings, and floors where the goal is to achieve a quieter and more comfortable environment.

Selected Articles

How do you soundproof and insulate a wall?

Sealing strip. A tight seal is essential for sound insulation!

How can you reduce noise, structure-borne sound, and vibrations?

Did you know that…

Did you know that the wall where the sound is heard most clearly isn’t always the main sound path? In older houses, sound can travel through interconnected timber, planks, masonry, and floor joists. It can also pass through cracks, wall joints, windows, doors, and penetrations.

This means that a heavy new interior wall doesn’t automatically solve the entire problem. If sound travels around the wall via the floor or ceiling, these alternate paths can limit the effectiveness of the solution. That’s why we recommend that you listen carefully and check the connections around the entire structural element before adding the new wall.

Calculate the size of your wall.

Calculation Tool – Calculate the size of your wall.

Before ordering materials, you need to know the size of the wall surface to be treated. Use our wall calculator to calculate the wall’s size based on its width and height. In older homes, each section of the wall should be measured separately if the room has slanted angles, deep window recesses, or other architectural features that affect the actual surface area.

The calculator helps you plan your material usage, but it does not determine which soundproofing method is suitable for timber, planks, or brick. The condition of the structure, the path of the sound, and the need for sealing or decoupling must still be assessed before selecting materials.

Soundproofing products for older homes.

The products listed below are used for various components of a sound-insulating system: a heavy barrier against airborne sound, vibration damping, cavity absorption, and sealing of joints or contact surfaces. The choice should always be tailored to whether the existing wall consists of timber, planks, or brick, and to how the new system can be installed without compromising the building’s condition or function.

SilentDirect MLV is a heavy, dense barrier suitable for situations where an older wall requires additional mass to dampen airborne sound.

SilentDirect Polaric combines barrier performance with vibration damping on hard surfaces and can be mechanically fastened or attached with a suitable adhesive when the substrate is not smooth and dense.

SilentDirect Seal is used for gaps, joints, and contact surfaces, as well as between studs and adjacent building components where direct contact can transmit vibrations.

SilentDirect Aluminum Sealing Tape is used to seal joints in sound-insulating structures where an opening could otherwise compromise the barrier’s effectiveness.

SilentDirect Neo provides a smooth, damping intermediate layer when vibrations and resonances need to be limited between an older wall and new cladding.

SilentDirect Neo Roll is a roll-form option for longer runs and larger continuous installations where the material needs to be cut to size on site.

SilentDirect Egg can be used as a profiled absorber in a new framing system to reduce resonances in the cavity.

SilentDirect Egg Roll provides equivalent profiled absorption in roll form for larger or irregular cavities where the material needs to be cut to size.

*Free shipping

Free shipping to a pickup location

5-Year Warranty

5-Year Product Warranty

Fast Delivery

Usually ships the same day

Adapt the sound insulation to the building’s original construction

Sound insulation in older homes must be planned based on the building’s actual construction. Log, plank, and brick walls have different masses, stiffnesses, joints, and connections, while older floor joists, doors, windows, and penetrations often create alternative paths for sound. Therefore, start by determining whether the disturbance consists of airborne sound—such as conversation and music—or structure-borne sound from footsteps, impacts, and vibrations. Then investigate whether the sound is actually passing through the wall perceived as the problem or traveling around it via the floor, ceiling, and adjacent building components.

Timber walls require consideration of movement and joints

Solid timber has significant mass, but sound can pass through gaps in joints, cracks, old caulking, and connections to floor joists. Timber can also shift over time. The sealing must therefore be selected and installed to suit the existing structure. If a new interior wall is built in front of the timber, it should be decoupled and not locked unnecessarily tightly to the old frame. A dense sound barrier and heavy interior paneling can then complement the existing wall.

Plank walls often require more mass and better decoupling

Older plank walls can be relatively thin and rigid. They may also have gaps between the planks, leaky joints, or layers of cardboard, plaster, and paneling materials that vary across different parts of the house. Inspect the entire wall before enclosing it. When space allows, a separate stud frame, dampened contact surfaces, absorbent material in the cavity, and new, heavy cladding typically provide better results than screwing a new layer of paneling directly onto the planking.

Brick walls are heavy but may have weak transmission paths

A solid brick wall often dampens airborne sound better than a lightweight wood wall, but the effectiveness can be limited by cracks, mortar joints, ventilation openings, floor joist connections, and through-wall installations. Therefore, identify the points of sound leakage before installing additional material. If the brick wall already has sufficient mass, a decoupled interior wall may be more effective than adding another thin layer directly against the brick. At the same time, the fastening must be adapted to the condition of the masonry.

Tightness, mass, and reduced vibration transmission

An effective solution typically combines sealing, mass, cavity absorption, and decoupling. Joints in a sound barrier can be sealed with SilentDirect Aluminum Sealing Tape. At studs and other contact surfaces, SilentDirect Seal can be used as a damping layer to reduce direct material contact, vibrations, and air leakage. A heavy barrier such as SilentDirect MLV can be combined with new, stable panel cladding where the construction and space allow it.

Preserve the home’s functionality while improving the acoustic environment

Do not conceal moisture, rot damage, loose joints, or other structural issues behind a new wall. Older homes may have materials and moisture control solutions that differ from modern construction, so the condition of the wall, ventilation, and appropriate fasteners must be assessed before installation. Complete soundproofing is rarely realistic, but a tailored combination of sealing, decoupling, and increased mass can provide a significant reduction in sound transmission without neglecting the building’s structural conditions.