

• Free shipping
  • 5-year warranty
  • Fast delivery

Soundproof penetrations—seal around pipes, cables, and ventilation ducts

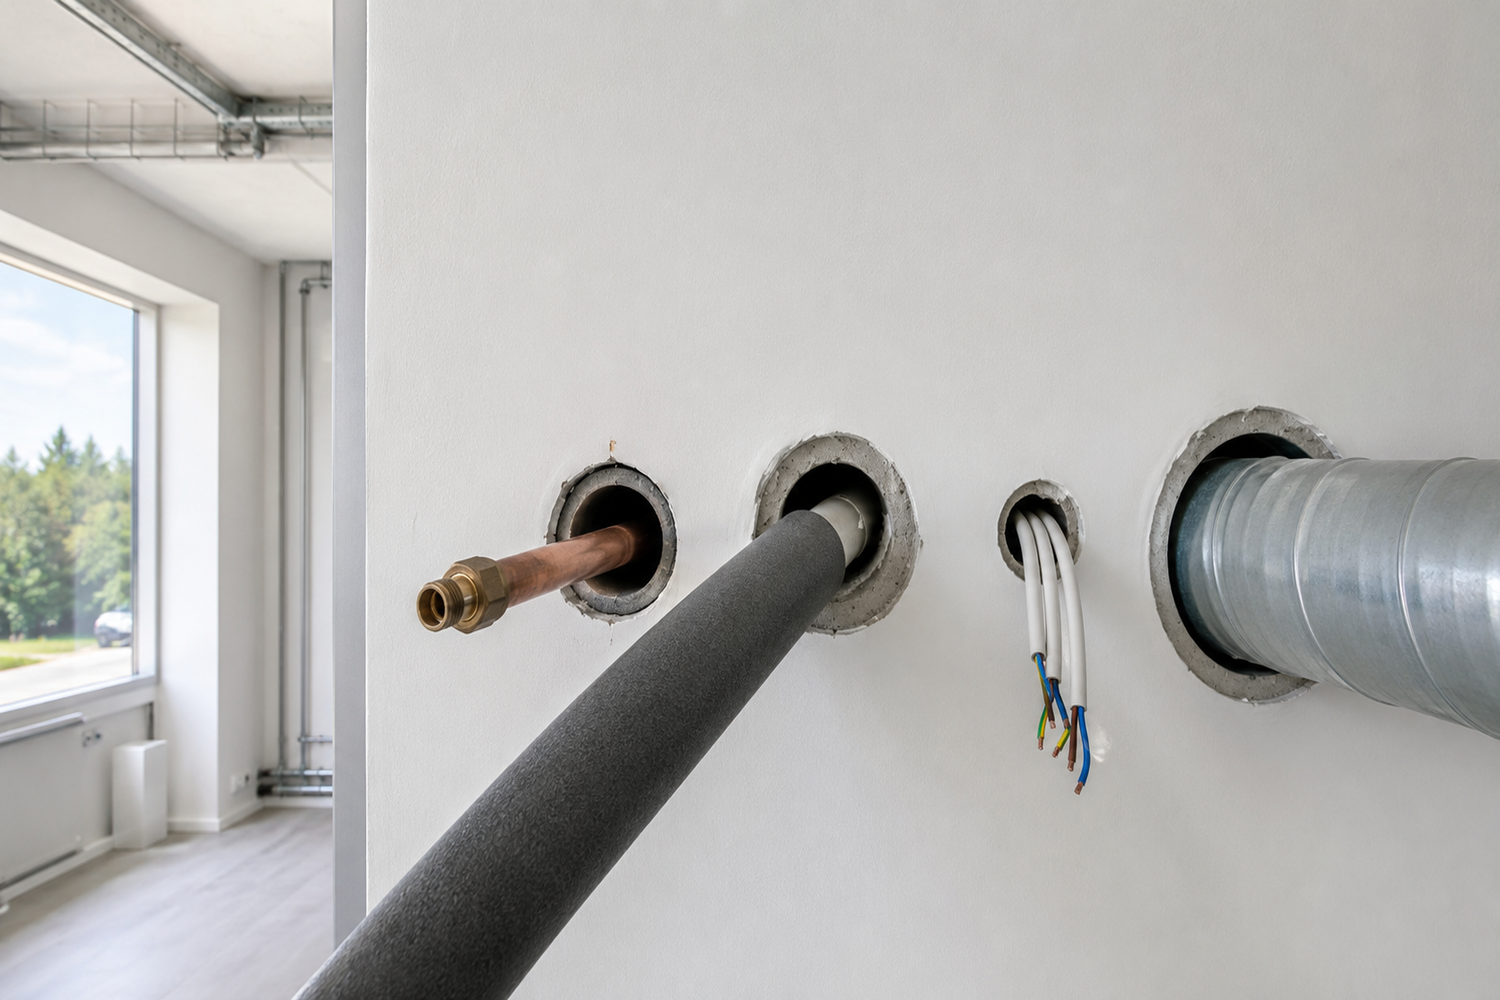
A wall, ceiling, or floor can be well soundproofed and still allow disturbing noise to pass through the penetrations. When pipes, cables, or ventilation ducts pass through a building element, breaks occur in the structure. If there is an open gap around the installation, it acts as a small but effective sound path between the spaces.

To reduce sound leakage, the entire connection must be treated, not just the most visible part of the opening. The seal should abut the building element and the installation, extend around the entire perimeter, and be effective even on the underside or back side. Pipes and ducts that vibrate must also be addressed so that movements are not transmitted directly into the structure.

The method must be adapted to what is passing through the opening. A stationary cable conduit, a vibrating water pipe, and a ventilation duct have different functions and impose different requirements. Penetrations may also be subject to fire protection, smoke tightness, moisture protection, and installation regulations. Such requirements always take precedence over a general acoustic solution.

Recommended Products

That is why openings affect sound insulation:


Open air passages allow sound to pass through

Sound can pass through very small gaps even when the rest of the surface is heavy and well-constructed.

Many small holes have a cumulative effect

Cable conduits, pipe fasteners, and duct connections can collectively create significant sound leakage.

Pipes can transmit vibrations

Water flow, pumps, and connected machinery can set the pipe in motion and transmit vibrations throughout the building.

Ducts transmit sound

A ventilation duct can carry sound through both the duct material and the open air path inside the duct.

Cable bundles are difficult to seal

Gaps between the cables may remain open even if the seal appears complete from the outside.

Unsealed connections can create sound bridges

Direct contact between a vibrating installation and a building component can increase the transmission of vibrations and structure-borne noise.

Retrofits can compromise the seal

New cables, replaced pipes, and other changes can create gaps in a penetration that was previously sealed.

Checking from one side isn’t always enough

Sound leakage can be hidden on the underside, inside the structure, or on the opposite side of the penetration. Therefore, inspect the seal from both sides whenever possible.

How to Seal and Soundproof Penetrations

We recommend that each installation be evaluated as a separate connection. Start by determining which installation passes through the building component, whether it is subject to movement or vibration, and what fire, moisture, or safety requirements apply. The seal should then be selected based on the design and checked around the entire opening.

Step 1 – Identify the sound path and check safety requirements

Determine whether the sound primarily passes through the gap, is transmitted through the pipe or duct, or is caused by vibrations in the installation. Listen on both sides while the connected equipment is in use. Also check whether the penetration is located at a fire compartment boundary, in a wet room, or in a structure with requirements for smoke, air, or water tightness.

Penetrations subject to such requirements must be sealed using a documented system intended for the installation and the building component. Do not conceal connections, dampers, electrical boxes, or service points that must remain accessible. If in doubt, have the work assessed by a qualified electrical, plumbing, ventilation, or fire protection contractor.

Step 2 – Clean the opening and assess the joint depth

Remove loose dust, crumbly material, and debris that would prevent the sealant from adhering. The substrate must be clean and stable. Check the width and depth of the gap around the entire installation, including on the underside and between cables. A decorative cover plate must not be used as proof that the opening behind it is sealed.

If the hole is unnecessarily large, the opening must be filled with a material suitable for the building component before the final joint is made. Avoid filling a deep opening with a thin, superficial bead that merely conceals the air path. The seal must form a continuous joint without visible gaps.

Step 3 – Seal Around Water and Drain Pipes

For pipe penetrations: First, ensure that the pipe is properly supported and does not rest directly against a sharp edge. A pipe that moves must have room for the movement that the installation is designed to accommodate. Then seal the annular gap with an elastic and compatible sealant approved for the specific environment.

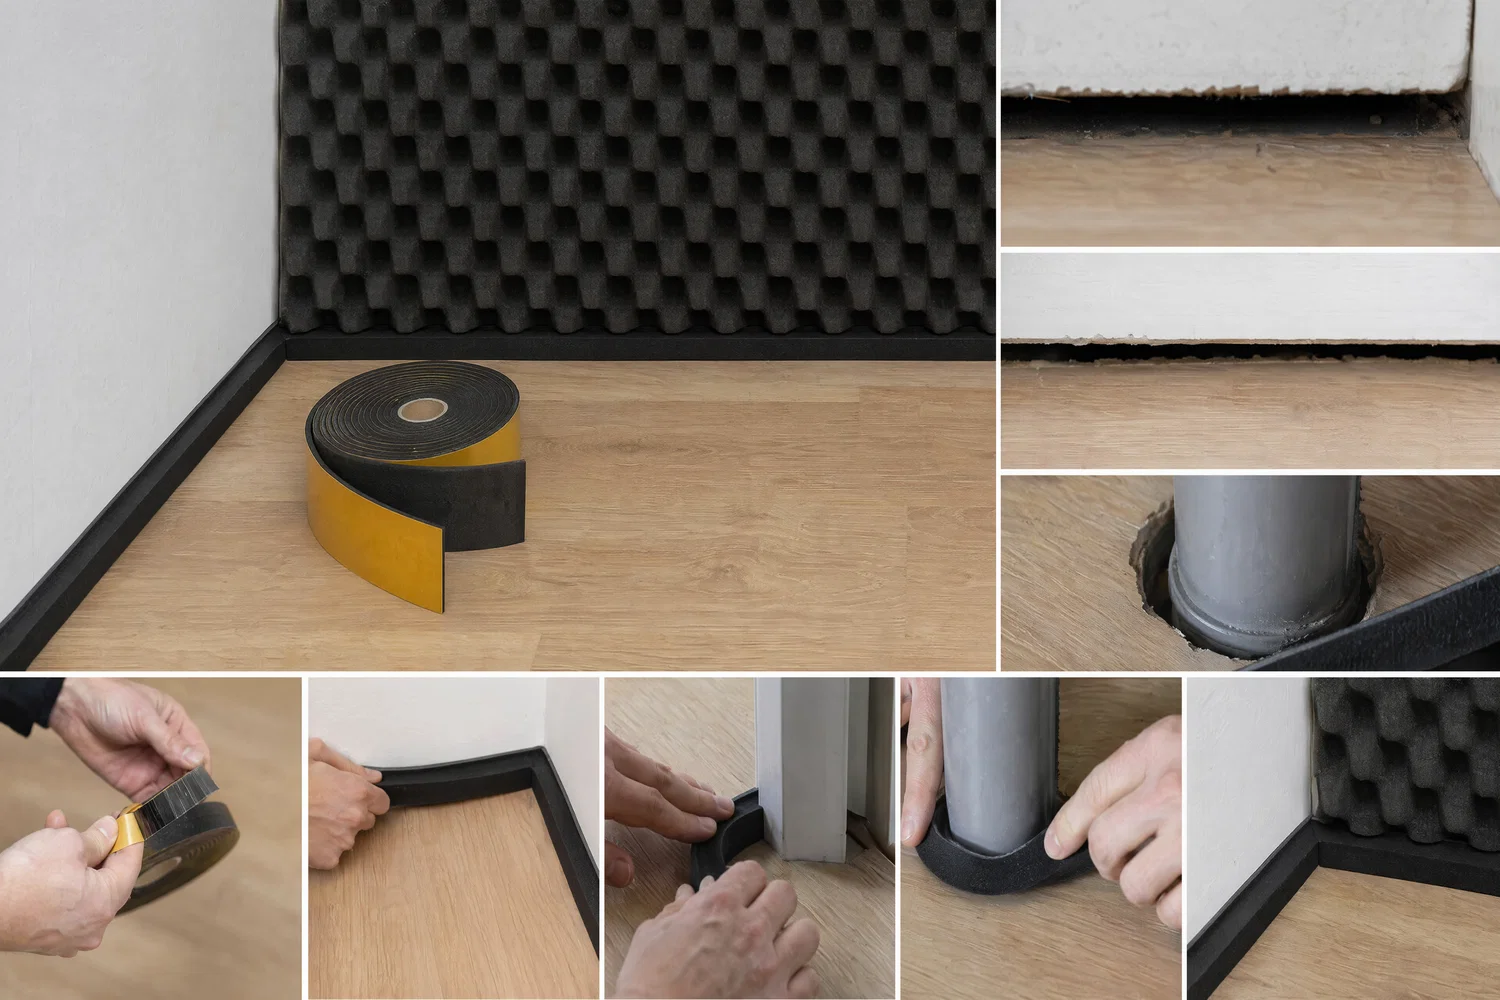
For smaller gaps or contact surfaces, SilentDirect Seal may be appropriate for reducing air leakage and limiting direct vibration contact. The seal should be selected in a thickness that provides even compression. It should not be used as a substitute for required fire sealing, wet room sealing, or a deep joint build-up.

If the pipe is vibrating, the cause must also be addressed. Check fastenings and connected equipment. A sealed joint stops air leaks but cannot, on its own, eliminate vibrations transmitted through the pipe itself.

Step 4 – Seal Cable Penetrations and Cable Bundles

For cables and cable conduits: Gather and arrange the cables so that the seal can reach around every relevant part of the opening. Pay special attention to the gaps inside a cable bundle. A seal around the outer edge of the bundle still leaves open air channels between the cables.

Use a system appropriate for the cable type, building component, and any fire code requirements. The seal must not damage the cable jacket or prevent future maintenance. If additional cables may need to be run later, a dedicated, re-accessible cable penetration is often better than a temporary fill.

When the work is complete, the cable bundle should be neatly arranged without the seal coming loose or cracking. Check both sides and mark the penetration according to the project’s installation requirements where necessary.

Step 5 – Treat the ventilation duct connection and sound path

For ventilation ducts: First, check the gap between the duct and the wall, ceiling, or floor. It must be sealed around the entire perimeter of the duct using a solution suitable for the duct material, movement, and the structural element’s requirements. For rectangular ducts, the corners require particularly careful inspection.

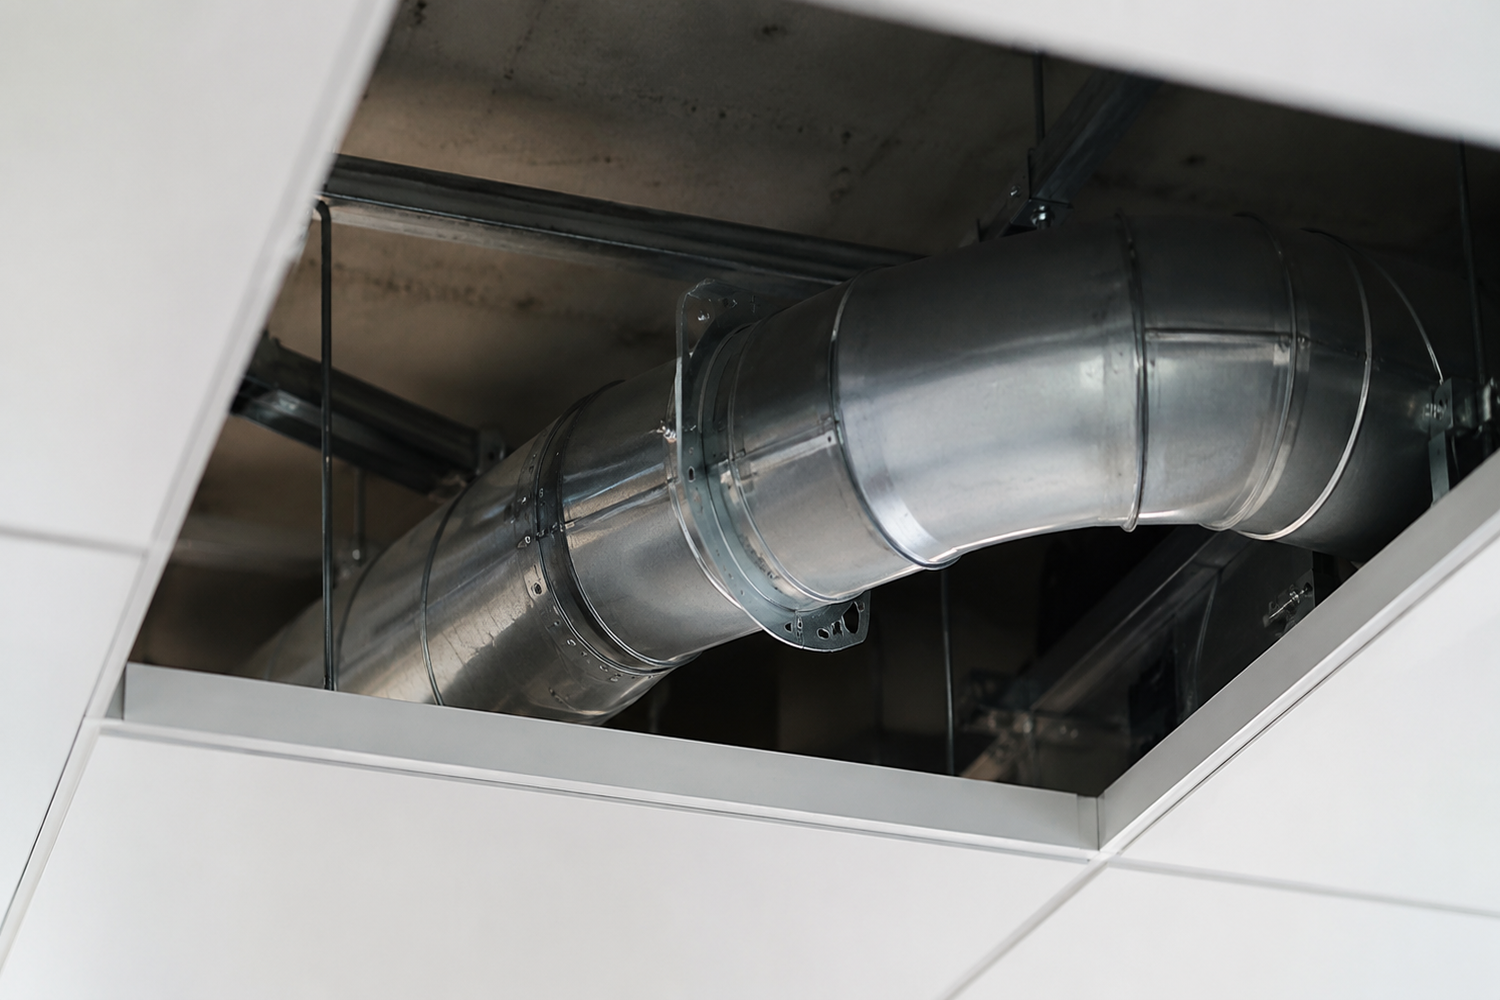
Sealing around the duct prevents air leakage at the building component, but sound can still travel inside the duct itself. SilentDirect Air is a moldable sound absorber for ventilation ducts and installations where sound needs to be dampened but airflow must still be maintained. Follow the product’s installation instructions and do not obstruct the duct’s function.

Seams and aluminum-clad transitions in a sound-insulating structure can be sealed with SilentDirect Aluminum Sealing Tape. Apply the tape to a clean surface and press it firmly over the entire seam. The tape is a sealing accessory and does not replace the required fire seal or the duct’s mechanical fastening.

Step 6 – Avoid rigid sound and vibration bridges

When working with sound insulation and vibration damping, one of the most important principles is to decouple materials from one another. If different building components are in direct contact with each other, vibrations, structure-borne sound, and sound energy can easily be transmitted through the structure.

Therefore, ensure that pipes, ducts, fasteners, and surrounding panel materials do not have unintended rigid contact. At the same time, decoupling must never make the installation unstable or conflict with its mounting requirements. Pipes and ducts must have proper support, while the vibration-damping layer is applied to the contact surfaces where the structure permits.

Step 7 – Check for Leaks Using the Light Test

Turn off the lights on one side of the structure and place a bright lamp on the other. Inspect the penetration from multiple angles. Visible light on the underside of the pipe, between cables, or in a duct corner indicates that an open path remains. This method works best where both sides of the structural element are accessible.

Step 8 – Check for airtightness using the pressure method

Create a slight pressure difference using a fan and check for drafts around the penetration. A thin strip of paper can make faint air currents easier to detect. Do not use smoke, an open flame, or any other method that could pose a risk near electrical equipment, ventilation systems, or combustible materials.

Repair any detected leaks and repeat the test. Inspect the seal again once the installation has been in operation, especially if the pipe or duct becomes hot, vibrates, or moves. A penetration is not considered complete until the connection is seamless, the installation is functioning properly, and all technical requirements are met.

Did you know that…

A small gap around a pipe, cable, or ventilation duct can affect sound insulation more than the size of the opening would suggest. Sound travels through the weakest parts of the structure, and therefore, several small gaps combined can create a clear path for sound between rooms.

A cover plate or a visibly sealed joint does not automatically mean that the penetration is sealed all the way through. Be sure to check the result using the light test and the pressure test. Also keep in mind that sealing around a ventilation duct reduces leakage at the wall, while sound traveling inside the duct needs to be addressed separately.

Selected Articles

Sealing strip. A tight seal is essential for sound insulation!

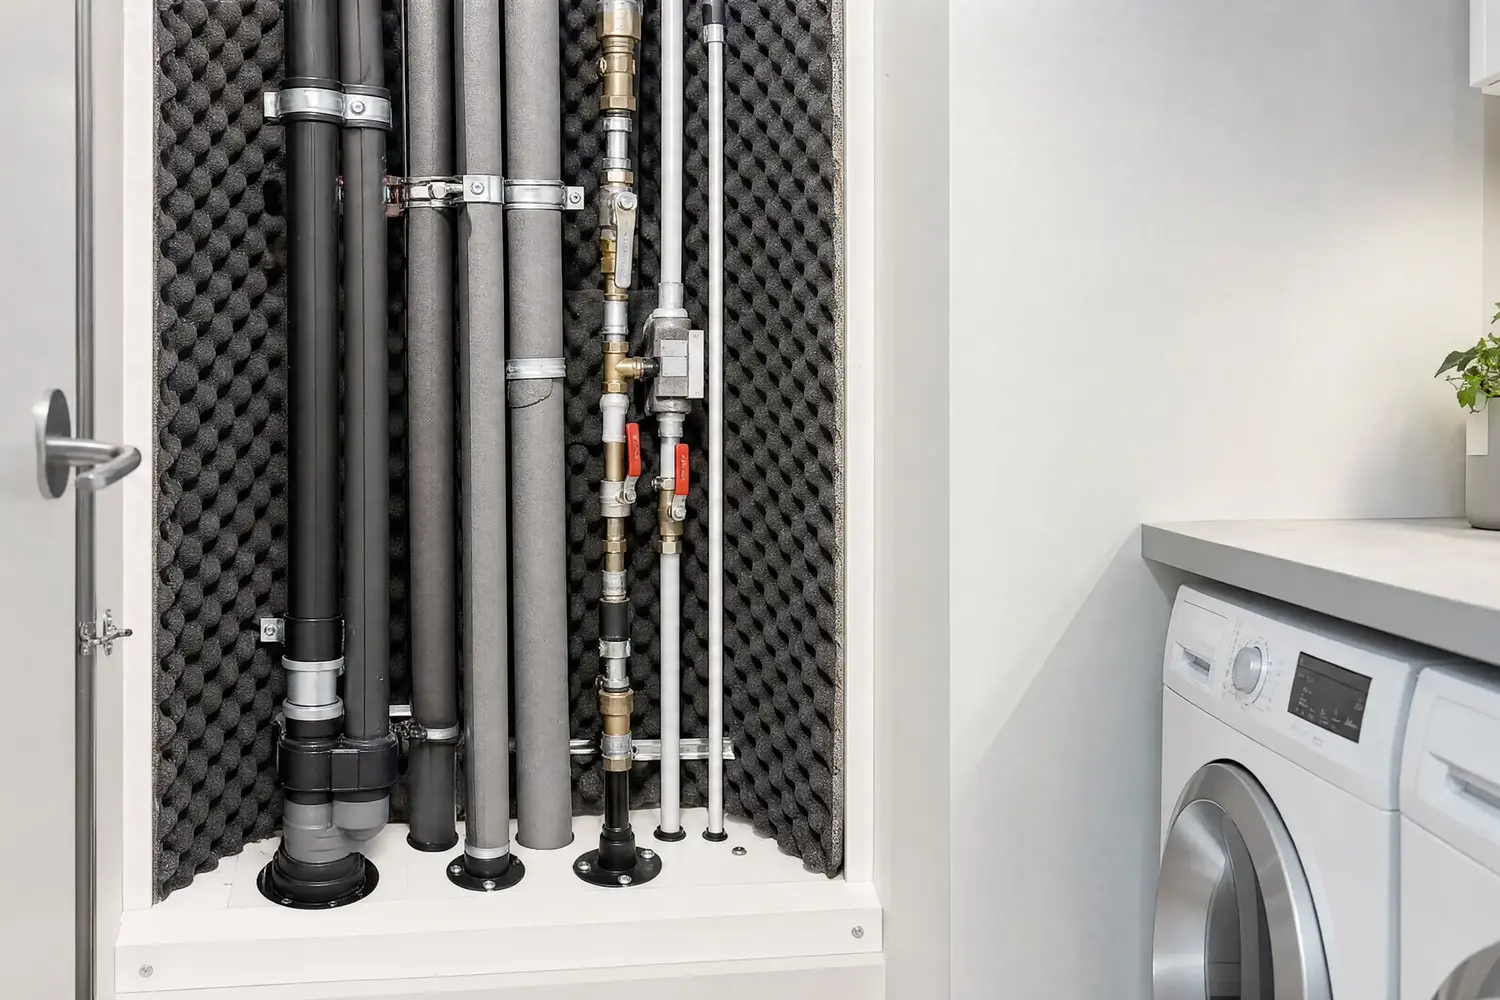
How to Soundproof Water Lines and Drain Pipes – Reduce Annoying Noise

How do you soundproof and dampen noise from ventilation ducts?

Products for sealing and soundproofing penetrations.

The choice of product depends on whether the problem is an open gap, noise inside a ventilation duct, or vibrations from connected equipment. The three most directly relevant products are SilentDirect Aluminum Sealing Tape, SilentDirect Seal, and SilentDirect Air. Other products are used as supplements when the surrounding structure, duct, or noise source also needs to be addressed.

SilentDirect Aluminum Sealing Tape is used to seal joints, seams, and aluminum-clad transitions in sound-insulating structures. It is particularly useful around ventilation ducts and other connections where a leaky joint can compromise sound insulation.

SilentDirect Seal is a self-adhesive sealing strip for gaps, joints, and contact surfaces where minor air leaks or vibrations need to be reduced. It can also be used as a decoupling layer where the installation would otherwise risk coming into direct contact with the structure.

SilentDirect Air is a moldable sound absorber for ventilation ducts and installations where sound needs to be attenuated but airflow must still be maintained. The product treats sound traveling through the duct, while the gap around the duct must be sealed separately.

SilentDirect MLV adds mass to structures where airborne sound needs to be dampened. The product may be relevant when the penetration is part of a wall, cladding, or installation box that also needs to be reinforced, but it does not replace the seal around the penetration itself.

SilentDirect Polaric is suitable for sheet metal, metal, and other hard surfaces where resonance and vibrations need to be dampened. It can serve as a complement on accessible metal ducts or sheet metal parts that vibrate in connection with the penetration.

Dampio PRO is used under pumps, machines, and other equipment that transmits vibrations to the floor. The product is suitable when pipes or cables transmit vibrations from connected equipment, but it does not address airborne sound leakage around the opening.

SilentDirect Sound Barrier 2.48 m can be used for temporary or flexible soundproofing in an accessible area where a barrier can be conveniently placed. When soundproofing pipes, this can be a suitable solution if you cannot access the sound source.

SilentDirect Neo is used on machinery, vehicles, and enclosures where a smooth foam surface is needed to dampen resonance and mechanical noise. It is a complementary choice when the disturbance originates from a connected machine or technical enclosure—not a general-purpose product for filling the gap around the feed-through.

*Free shipping

Free shipping to a pickup location

5-Year Warranty

5-Year Product Warranty

Fast Delivery

Usually ships the same day

Seal penetrations and reduce sound leakage in the structure

Pipes, cables, and ventilation ducts often have to pass through walls, ceilings, and floors. Each such penetration disrupts the structural integrity of the building and can create a path for airborne sound to travel between rooms. Even a narrow gap around a pipe or a bundle of cables can therefore compromise sound insulation more than one might initially think. For optimal results, the opening must be properly sized, sealed all the way around the installation, and adapted to accommodate movement, vibrations, and other technical requirements.

Soundproofing a penetration is not just about covering the hole. The seal must make a proper connection to both the building structure and the pipe, cable, or duct. Deep and irregular openings need to be built up in a controlled manner so that no open air path is left behind. Where an installation may move or vibrate, one should avoid an unnecessarily rigid connection that transmits vibrations directly to the wall, ceiling, or floor.

Different penetrations require different assessments

Pipe penetrations can transmit both airborne sound through the gap and vibrations from water flow, pumps, or connected systems. Cable penetrations often become leaky when many cables are bundled together in an opening that is too large or when new cables are added later. Ventilation ducts also serve as an open pathway for sound and therefore need to be assessed both at the connection to the building structure and inside the duct system itself.

SilentDirect Air is a moldable sound absorber for ventilation ducts and installations where sound needs to be attenuated but airflow must still be maintained. The product treats sound within the duct, while the gap between the duct and the building structure must still be sealed with a solution that meets the requirements of the construction and installation.

Seal joints and connections without leaving small leaks

SilentDirect Aluminum Sealing Tape is suitable for sealing joints, seams, and aluminum-clad transitions in sound-insulating structures. The tape can help keep connecting layers sealed where a small leak might otherwise compromise the result. However, it does not replace a properly dimensioned joint or an approved fire-, smoke-, or moisture-resistant seal when the construction calls for such requirements.

At contact surfaces and small gaps, SilentDirect Seal can be used to reduce air leakage and limit direct vibration transmission. The sealing strip is available in several thicknesses and should be selected so that it compresses evenly without forcing the installation out of position.

Verify that the penetration is truly sealed

Always inspect the seal from both sides whenever possible. Using the light test, place a bright lamp on one side and look for visible light from the other. With the pressure test, create a gentle pressure difference—for example, using a fan—and check for drafts with your hand or a thin strip of paper. Pay special attention to cable bundles, the undersides of pipes, duct corners, and joints that are difficult to see directly from the front.

Penetrations in fire compartment boundaries, wet rooms, and structures with special requirements must be sealed using systems approved for the specific application. Electrical, ventilation, water, and sewer systems may also require a licensed installer. A soundproof solution must never compromise fire protection, electrical safety, ventilation, drainage, service access, or the installation’s ability to function as intended.