




• Free shipping
  • 5-year warranty
  • Fast delivery

Is the sound coming through the wall, ceiling, or floor? Here's how to identify the source of the sound

The surface that sounds the loudest isn’t always the one through which the sound is actually traveling. A conversation from the neighboring apartment may seem to come straight through the wall, but in reality, it’s transmitted through the floor joists, an adjacent ceiling, a ventilation duct, or a gap around a penetration. Similarly, footsteps from the floor above can be heard both in the ceiling and further down the walls.

To choose the right sound insulation, you therefore need to distinguish between the location where the sound originates, the path the sound energy takes through the building, and the surface that radiates the sound into your room. These three locations may be different.

Direct sound transmission and flanking transmission

Direct sound transmission means that the sound primarily passes through the building element separating the spaces, such as a shared wall or a floor joist. Flank transmission means that the sound travels around the building element via adjacent walls, ceilings, floors, or installations. If the sound is clearly audible along multiple corners and joints, flank transmission may be a significant part of the problem.

The nature of the sound provides important clues

Voices, music, and TV sound are normally transmitted first as airborne sound. Footsteps, impacts, scraping furniture, and machine vibrations often account for a larger proportion of structure-borne sound. Structure-borne sound can travel long distances through solid structures, making it difficult to pinpoint a single surface by ear.

Also listen to see if different frequencies seem to be coming from different locations. Clear speech can reveal a crack or a weak connection, while muffled bass and vibrations often spread more widely through the building structure. The auditory impression is a clue, not a definitive measurement result.

Investigate Before You Build

A systematic investigation can save both time and materials. Recreate the same sound, listen at specific points, and note where the sound level changes. Compare the center of building components with corners, edges, outlets, pipes, ventilation, and doors. Then repeat the test on another day so that your conclusion isn’t based on a single instance of sound.

When the results point to multiple building components, a professional sound measurement or a structural assessment may be necessary. This is particularly important before undertaking extensive renovations in a condominium, rental unit, or shared-ownership building.

Recommended products.

Important tips for tracing the source of a sound:


Most noticeable in the middle of the wall

This may indicate direct airborne sound transmission through the wall, but also check outlets, penetrations, and wall joints.

Strongest along corners and edges

This may indicate flank transmission or leaky joints between building components.

Footsteps and impacts are heard over a large area

This often indicates that vibrations are spreading through the floor joists and the building frame.

Clear speech at a small spot

Check for cracks, electrical outlets, pipes, ventilation, and other possible air leaks.

The sound changes when the door is closed

Door gaps, the hallway, or the stairwell may be a significant part of the sound path.

Multiple surfaces vibrate simultaneously

The problem may require decoupling or vibration damping, not just adding more mass to a surface.

A muffled bass can be heard far from the source

Low frequencies can travel through multiple interconnected structures and are often difficult to pinpoint by ear.

The sound level varies from day to day

Repeat the tests to ensure that temporary noise sources or background noise do not lead to incorrect conclusions.

Here's how to figure out which path the sound takes

Start with an investigation that’s easy to repeat on multiple occasions. The goal isn’t to draw a definitive conclusion after a single listening session, but rather to gradually gather several clear clues. By comparing where the sound is loudest, how it changes between different locations, and whether the results are consistent, you can more easily determine whether the dominant sound path travels through the wall, the ceiling, the floor, a joint between building components, or through the building’s structure.

Step 1 – Recreate a familiar sound

Choose a sound that can be repeated with roughly the same intensity and location. For airborne sound, this could be speech or music at a consistent volume. For structure-borne sound, another person can walk the same distance, move a chair in a controlled manner, or tap lightly on a specific spot. Avoid heavy impacts that could damage the building or disturb others.

Note the source’s location and keep doors, windows, and furniture in the same position during each comparison. If you cannot control the source, you should make several observations when the same everyday sound recurs.

Step 2 – Determine whether the noise is primarily airborne or structure-borne

If voices or music are heard clearly and intelligibly, airborne sound is likely a major part of the problem. If you mainly hear thuds, footsteps, scraping, or feel vibrations, it is often structure-borne sound. Mixed problems are common: a machine can both emit airborne sound and transmit vibrations through its foundation.

Lightly place your hand against different surfaces while the sound is occurring. A distinct vibration is a useful clue, but the absence of a noticeable vibration does not rule out structure-borne sound.

Step 3 – Inspect the wall

First, listen in the center of the suspected wall. Then move along the wall toward the corners, the baseboard, and the ceiling junction. Also compare areas around electrical outlets, pipes, fasteners, and other penetrations. If the sound is noticeably louder at a small spot, there may be a local weakness or leak.

If the entire wall sounds roughly the same, the sound may be passing through the wall, but the wall may also be acting as a surface that radiates vibrations coming from the floor, ceiling, or adjacent walls.

Step 4 – Inspect the ceiling

Compare the center of the ceiling with its edges and the junctions with the walls. Footsteps from the floor above often travel through the floor structure and can radiate from both the ceiling and the walls. If the sound follows a person’s movement above or consists mainly of thuds and impacts, the floor structure is likely involved.

A sound that is loudest near a vent, a pipe, or a ceiling penetration, on the other hand, may follow a more concentrated path. Do not alter or block the ventilation during the inspection.

Step 5 – Inspect the floor

Listen near the center of the floor, the edges, thresholds, and pipe penetrations. Feel for vibrations when footsteps, machinery, or other recurring sounds are present. If the vibrations are most noticeable near a specific piece of equipment, the sound source itself and its contact with the floor should be investigated before planning a major floor renovation.

Noise from the floor below can also radiate upward through the floor. If it is also heard along the lower parts of the walls, the noise may be transmitted through the floor joist connections.

Step 6 – Check for gaps and penetrations

Use the light test wherever practical: block out one side and shine a light along the joints from the other side to detect visible openings. Also use the pressure test by closing doors and windows and feeling for drafts along joints, moldings, and penetrations. These methods do not reveal the entire sound picture, but can identify leakage points that compromise an otherwise solid structure.

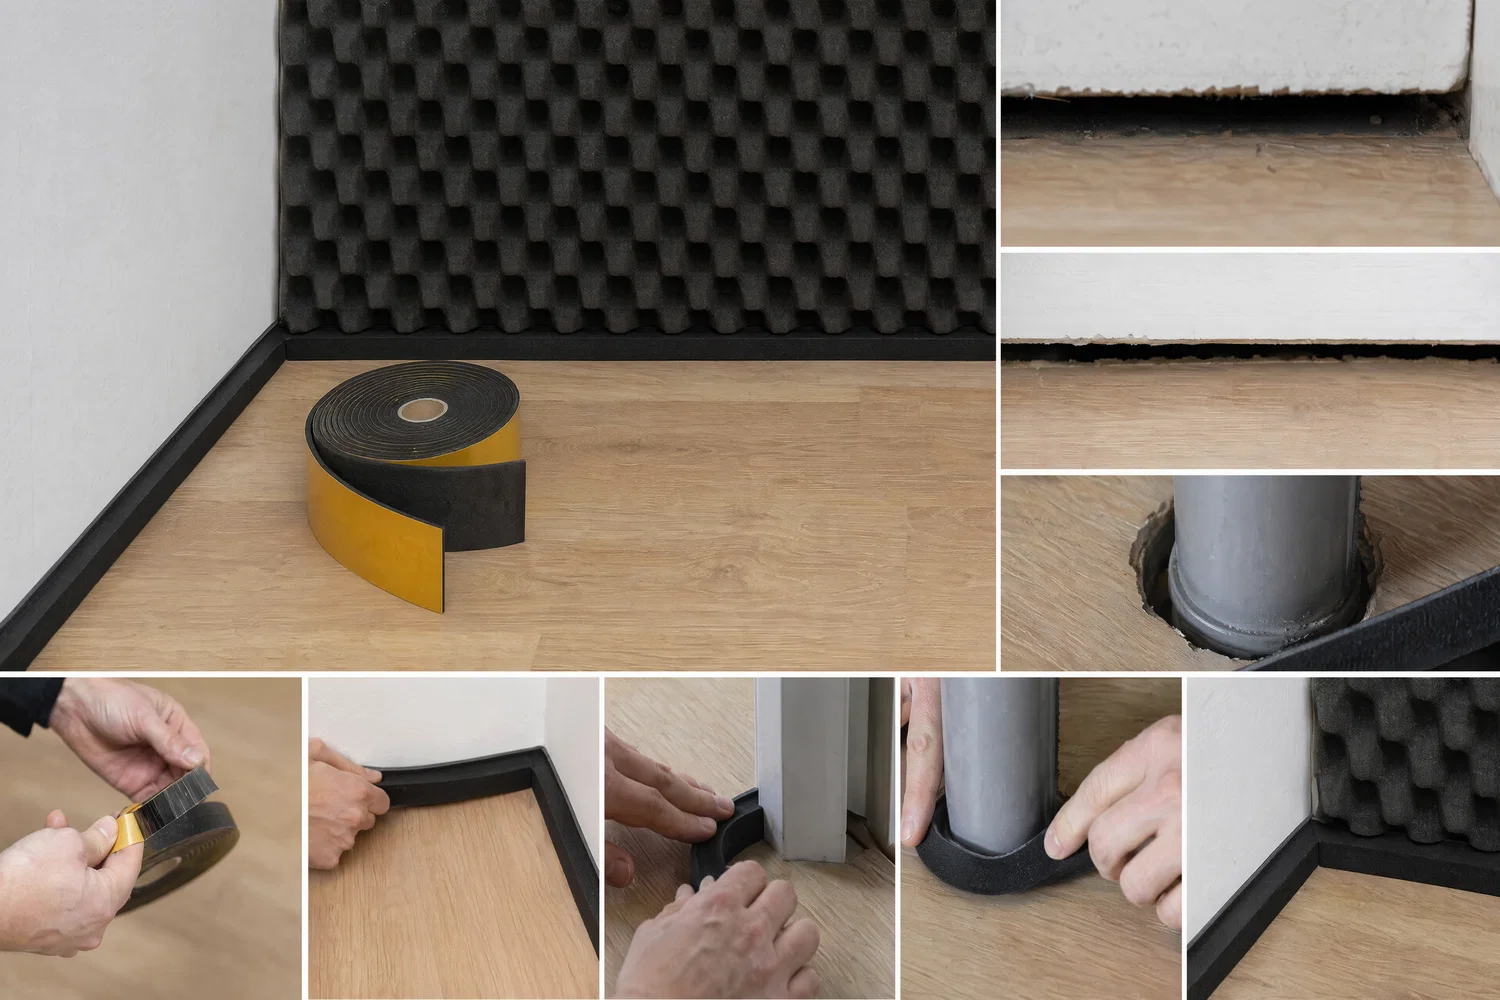
Pay particular attention to door gaps, connections between building components, pipes, cable runs, and joints in sound-insulating materials. SilentDirect Aluminum Sealing Tape can be used for relevant joints and aluminum-clad transitions. SilentDirect Seal is suitable for gaps, joints, and contact surfaces where minor air leaks or vibrations need to be reduced.

Step 7 – Look for Flank Transmission

Mark the points where the sound is most noticeable on a simple sketch of the room. If the loudest points are located along multiple edges, in two adjacent building components, or far from the expected source, the sound may be traveling indirectly. In that case, also check side walls, floor joists, stairwells, hallways, doors, and shared utility systems.

Step 8 – Compare the results and select the correct building element

A clear and reproducible level difference in the middle of a building element is more indicative of direct transmission. High levels at edges and across multiple building elements are more indicative of flanking transmission. Vibrations and rumbling over large areas make structure-borne noise more likely. A small spot where speech or music becomes unusually clear should be investigated as a possible air leak.

Proceed to the specific guide for walls, ceilings, or floors only when multiple observations point in the same direction. If the results are contradictory or if a major renovation is planned, we recommend that an acoustician or building engineering expert examine the structure.

When Decoupling Is Needed

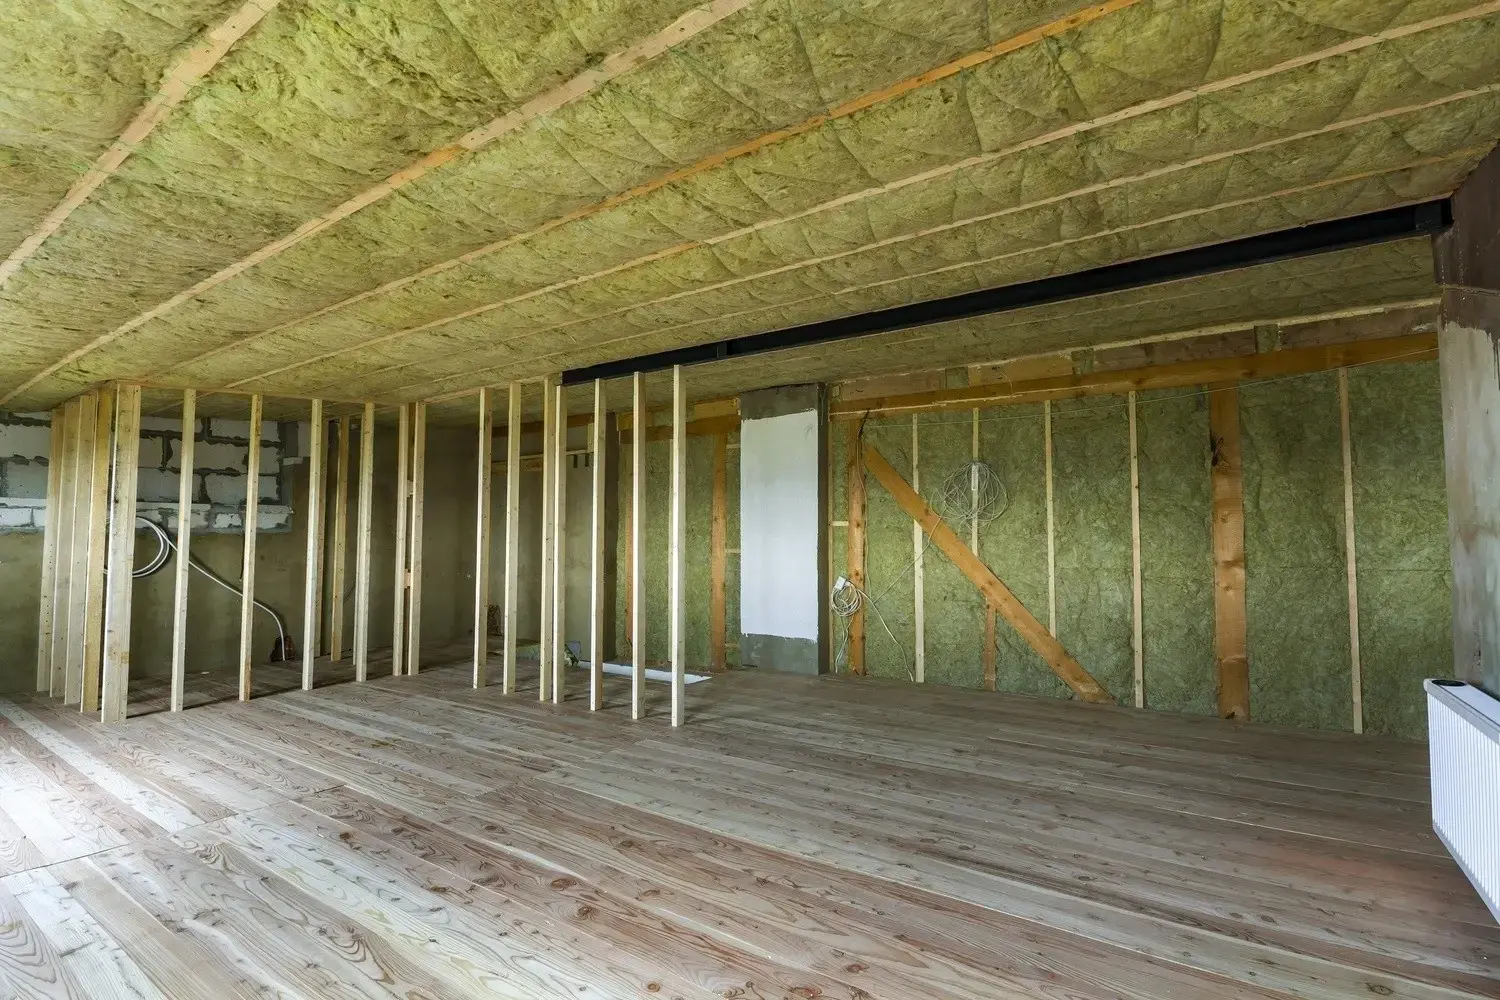
When working with sound insulation and vibration damping, one of the most important principles is to decouple materials from one another. If different building components are in direct contact with each other, vibrations, structure-borne sound, and sound energy can easily be transmitted through the structure. This applies, for example, when constructing a framing system for walls, ceilings, or floors.

To reduce this transmission, the parts of the stud frame that come into contact with other surfaces should first be fitted with a vibration-damping layer. SilentDirect Seal is an effective option here. The product is a sealing strip made of nitrile rubber (NBR) and is designed to reduce sound leakage, dampen vibrations, and contribute to a tighter construction.

SilentDirect Seal is placed between the stud and the surfaces it would otherwise rest directly against—such as the floor, ceiling, an existing wall, or a new wall structure. This creates a decoupling between the materials. The stud then has no direct contact with surrounding surfaces, which reduces the risk of vibrations and structure-borne sound being transmitted through the structure.

The result is more effective sound insulation, as both sound leakage and vibration transmission are limited. At the same time, this decoupling must be combined with the appropriate mass, density, and construction for the identified sound path.

Did you know that…

Did you know that the surface where the sound is heard loudest isn’t always the surface through which the sound passes? Sound can take an indirect path through floor joists, adjacent walls, ceilings, floors, and building services before radiating into the room.

This is called flanking transmission and is an important reason why you should examine multiple building components before selecting a soundproofing measure. Otherwise, there is a risk that the visible surface will be reinforced while the dominant sound path remains unaddressed.

Selected Articles

How to Soundproof a Room

A tight seal is the key to soundproofing!

How can you reduce noise and minimize structure-borne noise?

Products that are useful once the sound path has been identified

Once you have identified the dominant sound path, it becomes easier to choose the right type of product. The following products can be used for sealing, adding mass, sound attenuation, decoupling, or vibration damping, depending on whether the problem is located in a building component, a joint, a penetration, or the contact point between a machine and the building’s structure.

SilentDirect Seal is used for gaps, joints, and contact surfaces where small air leaks or vibrations can compromise sound insulation. The sealing strip can also be used as a vibration-damping layer between studs and adjacent surfaces.

SilentDirect Aluminum Sealing Tape is suitable for sealing joints, seams, and aluminum-clad transitions in sound-insulating structures.

SilentDirect MLV is a heavy-duty barrier used when a structure requires greater mass and density to reduce the transmission of airborne sound.

SilentDirect Polaric is a self-adhesive barrier mat for sheet metal, metal, and other hard surfaces where mass, sealing, and vibration damping need to be combined.

SilentDirect Neo has a smooth surface and is used to dampen vibrations, resonances, and mechanical noise in structures, vehicles, and enclosures.

SilentDirect Neo Roll is suitable for larger surfaces and longer installations, where the roll format makes Neo easier to cut to size and install.

SilentDirect Egg is a profiled absorber for machinery, technical spaces, and enclosures where sound needs to be captured close to the source.

Dampio PRO is placed under machines, pumps, and other equipment that would otherwise risk transmitting vibrations and structure-borne noise through the floor.

*Free shipping

Free shipping to a pickup location

5-Year Warranty

5-Year Product Warranty

Fast Delivery

Usually ships the same day

Trace the source of the sound before deciding on a course of action

When a disturbing sound is heard in a room, it’s easy to point to the nearest wall. But sound doesn’t always take the shortest path. It can pass directly through a wall, ceiling, or floor, but it can also be conducted around the structural element via joints, floor joists, side walls, pipes, ventilation ducts, doors, and small gaps. This indirect transmission is called flanking transmission. Therefore, identify where the sound is coming from, what it sounds like, and where in the room it is loudest before planning a solution.

Distinguish between airborne sound and structure-borne sound

Voices, music, and TV sound are typical examples of airborne sound. If the sound is most clearly heard near a specific surface, joint, or penetration, that point may be a significant sound path. Footsteps, impacts, scraping furniture, and vibrations from machinery, on the other hand, set the building in motion and can propagate as structure-borne sound through multiple interconnected components. In such cases, the sound may be perceived at the ceiling or wall even though the source is affecting the floor in another room.

Compare walls, ceilings, floors, and joints

Systematically listen for the same recurring sounds. Start in the middle of the wall, continue along corners and transitions to the ceiling and floor, and then compare the other surfaces. Also check electrical outlets, pipe penetrations, ventilation grilles, and door gaps. A clear difference in sound level provides a clue, but a large area that sounds noisy does not automatically mean that the entire surface is the sound path. Thin panels and interconnected frames can radiate sound over a larger area.

Test at several different times and document the results in a simple sketch. If possible, ask someone to create a steady sound or take controlled steps in an adjacent space while you listen from fixed points. A mobile app can help you compare relative levels, but it is no substitute for professional sound measurement when the cause is difficult to determine.

Check for air leaks

Airborne sound travels through small openings. Use the light test by darkening one side and shining a light along the joints from the other, or the pressure test by closing doors and windows and checking for drafts at suspected joints. When installing a sound-insulating structure, joints and connections must be airtight. SilentDirect Aluminum Sealing Tape is suitable for joints and aluminum-clad transitions, while SilentDirect Seal can be used on gaps, joints, and contact surfaces where air leakage or vibrations need to be reduced.

Choose a solution based on the dominant sound path

If the tests clearly point to a wall, ceiling, or floor, you can proceed to the guide for that building component. If the sound is loudest at multiple edges or recurs in adjacent surfaces, flanking transmission and structure-borne sound must be taken into account. In such cases, it is not always sufficient to reinforce the surface that seems most obvious. A solution may need to combine mass, density, absorptive layers, and decoupling. Decoupling involves separating the contact points of the materials with a vibration-damping layer so that sound energy is not transmitted as easily.

Don’t undertake major renovations after just a quick listen. Gather several clues, start with obvious sources of sound leakage, and consult an acoustician or building engineer when sound is transmitted through multiple structural elements. An accurate diagnosis reduces the risk of addressing the wrong structural component.