



• Free shipping
  • 5-year warranty
  • Fast delivery

How do you soundproof and insulate a metal roof?

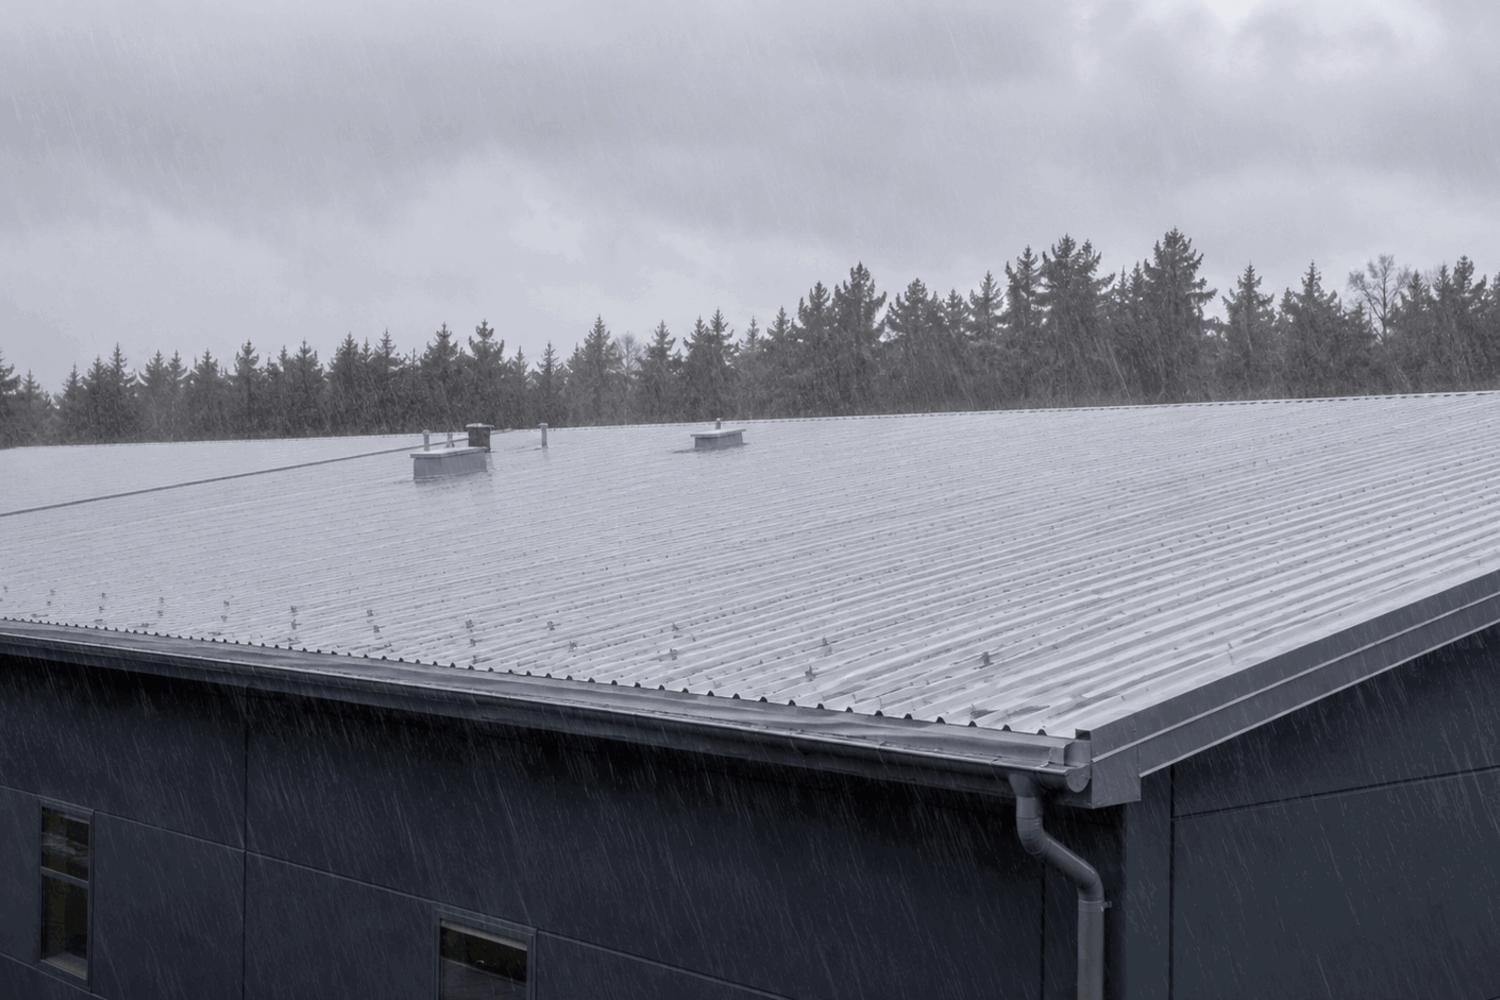
Rain, hail, and wind can cause a metal roof to vibrate and radiate sound over a large area. The sound can then be transmitted through the roof trusses, joists, and fasteners, or pass through a lightweight, non-airtight roof structure. For this reason, a single thin sound-absorbing material is rarely sufficient.

For best results, you need to combine measures that dampen the metal’s resonance, reduce direct contact between building components, absorb sound in the cavity, and add mass to the interior ceiling. If the main problem is echo inside a room, ceiling absorbers can improve room acoustics, but they do not, in and of themselves, prevent rain noise from passing through the roof.

The roof’s moisture, condensation, and ventilation functions must never be compromised. Therefore, check the structure and load-bearing capacity before beginning work. When making alterations to the exterior roof, suspended ceiling, or load-bearing components, we recommend that a qualified roofer or structural engineer evaluate the solution.

Recommended Products

Important considerations when soundproofing a metal roof.

The sheet metal can act as a membrane

Rain and hail set the thin metal surface in motion. As a result, the sound can radiate from a significantly larger surface area than the actual point of impact.

Loose parts can create extra rattling

Check metal sheets, hardware, and fasteners before installing soundproofing material. Any mechanical defect must be corrected at the source.

Resonance damping and sound insulation are not the same thing

Damping reduces the sheet metal’s vibrations, while a sealed, high-mass construction limits the sound that enters the room.

Decoupling reduces vibration transmission

A damping layer between studs and adjacent building components reduces the direct path for vibrations and structure-borne noise.

An absorbent material is needed in the cavity

A porous, sound-absorbing material in the air gap reduces resonances between the existing ceiling and the new ceiling cladding.

Sealing determines the overall performance

Seams, edges, and penetrations must be carefully sealed, as even small openings can allow a disproportionately large amount of sound to pass through.

Room absorbers do not stop sound transmission

Ceiling absorbers reduce reverberation inside the room but do not replace a heavy, airtight suspended ceiling when sound passes through the structure.

The roof’s structural integrity must be preserved

Moisture, condensation, ventilation, drainage, fire safety, and load-bearing capacity must be checked before altering the ceiling’s layers or fastenings.

How to Soundproof and Sound-Absorb a Metal Roof

A metal roof may require repairs both near the metal sheeting and from inside the room. Always start by checking the roof’s condition, construction, and sound pathways. Materials on the outer roof or the underside of the metal sheeting must not compromise moisture protection, condensation control, ventilation, drainage, or fire safety.

Before you begin

Inspect the metal sheeting, fasteners, screws, and other fixings. Loose parts that rattle must be secured before installing the sound insulation. Also inspect the existing ceiling for cracks, joints, holes, and penetrations through which sound can leak.

Seal any suitable openings with acoustic or flexible sealant. Pay particular attention to connections to walls, pipes, electrical installations, and ventilation ducts. A completely soundproof metal ceiling is difficult to achieve, but a combination of resonance damping, decoupling, absorption, mass, and sealing can provide a significant improvement.

If the underside of the sheet metal is accessible, dry, and suitable, SilentDirect Polaric be applied to suitable metal sections to reduce resonance. Installation must be assessed in relation to the roof’s construction and must not block ventilation or cause moisture problems.

the condition, construction, and sound paths of the roof. Materials on the outer roof or the underside of the sheet metal must not compromise moisture protection, condensation management, ventilation, drainage, or fire safety.

Before you begin

Check the sheet metal, fasteners, screws, and other fixings. Loose parts that rattle must be secured before installing the sound insulation. Also inspect the existing ceiling for cracks, joints, holes, and penetrations through which sound can leak.

Seal any suitable openings with acoustic or flexible sealant. Pay special attention to connections to walls, pipes, electrical installations, and ventilation ducts. A completely soundproof sheet metal ceiling is difficult to achieve, but a combination of resonance damping, decoupling, sound absorption, mass, and sealing can provide a significant improvement.

If the underside of the sheet metal is accessible, dry, and suitable, SilentDirect Polaric be applied to suitable metal sections to reduce resonance. Installation must be evaluated in relation to the roof’s construction and must not block ventilation or cause moisture problems.

Step 1: Inspect the existing ceiling

Ensure that the interior ceiling surface is stable, dry, and free of loose materials. Seal any visible gaps, holes, and penetrations before installing the remaining layers.

Step 2: Dampen the contact surfaces of the framing

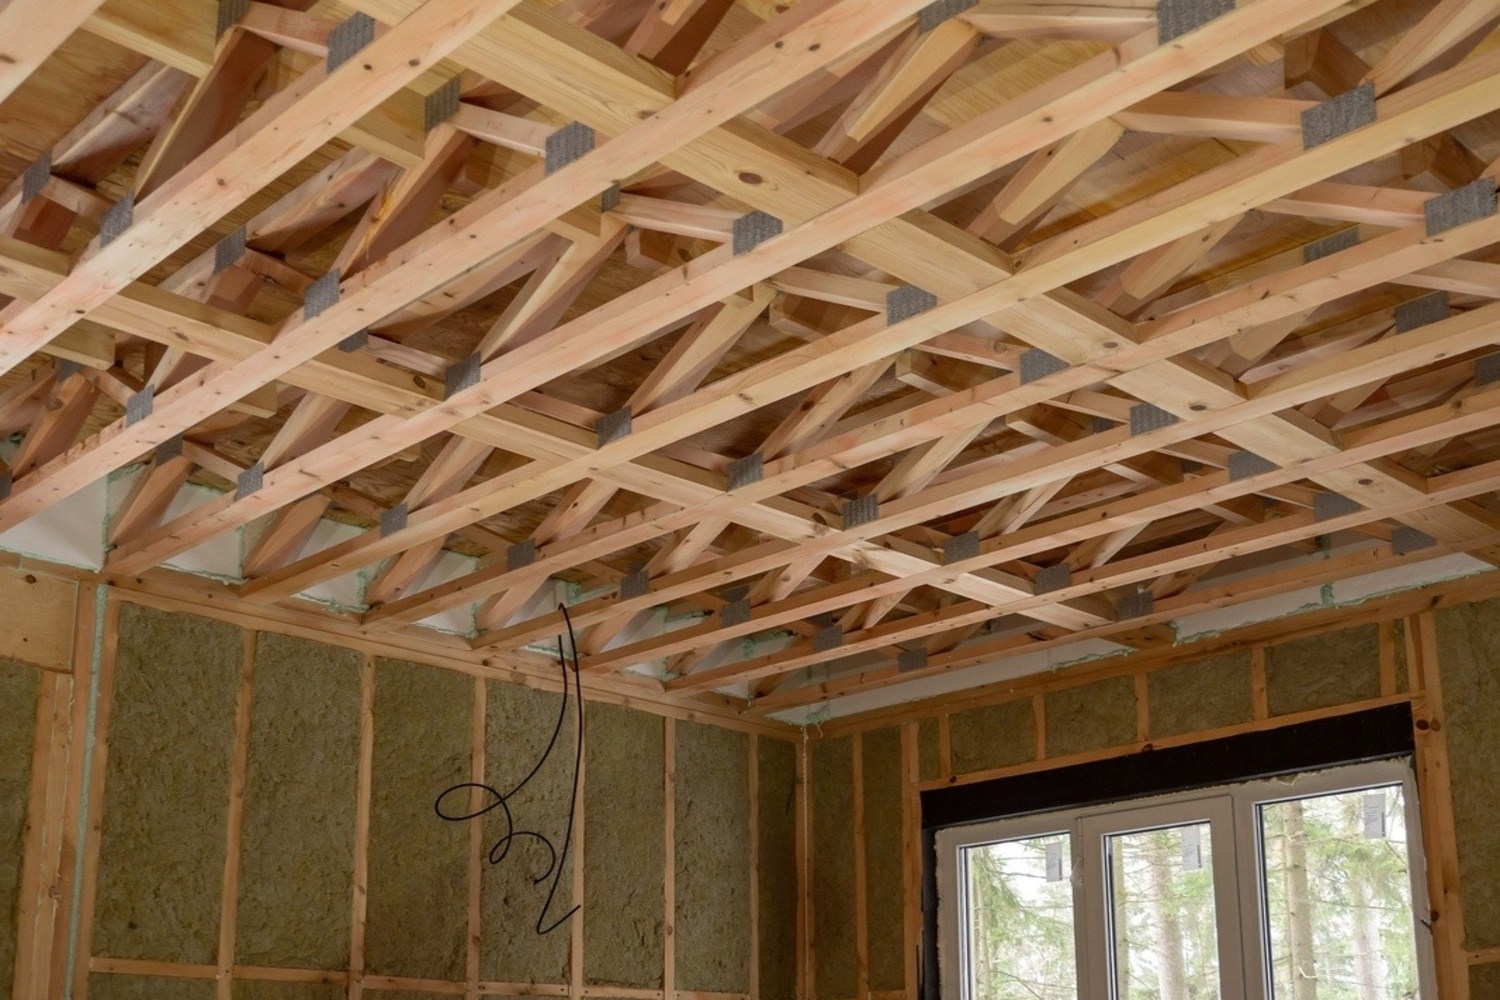
All parts of the joists that come into contact with the existing roof, walls, or the new roof covering must be fitted with SilentDirect Seal. The nitrile rubber sealing strip creates a damping intermediate layer and reduces the direct transmission of vibrations and structure-borne noise.

The studs must not be in unsprung contact with surrounding building components. Rigid connections can transmit vibrations past other sound insulation layers and compromise the result.

Step 3: Fill the cavity with SilentDirect Egg

Fill the cavity between the joists with SilentDirect Egg. We recommend 35 or 50 mm when the depth of the structure allows it. The material reduces resonances in the air gap between the existing ceiling and the new subceiling.

Step 4: Install SilentDirect Polaric

Install SilentDirect Polaric to fully cover the intended roof surface or joist structure according to the conditions of the substrate. The material adds mass and helps reduce vibrations caused by, for example, rain, hail, and the movement of the metal roof.

Step 5: Seal all seams

Seal the seams in the Polaric layer with SilentDirect Aluminum Sealing Tape. Be especially careful at edges, corners, and penetrations where sound might otherwise pass through the barrier.

Step 6: Add SilentDirect MLV for airborne sound

If rain noise or other airborne noise still risks passing through the roof structure, SilentDirect MLV be installed as a heavy, dense barrier layer. MLV should be supported and mechanically fastened in a manner appropriate for the roof’s load and construction.

Also seal the joints of the MLV layer with SilentDirect Aluminum Sealing Tape to ensure the barrier is as continuous as possible.

Step 7: Install a new heavy-duty subceiling

Finish with two layers of drywall, one layer of OSB followed by drywall, or another equivalent heavy and stable panel cladding. Offset the panel joints between the layers and avoid unnecessarily rigid connections to surrounding building components.

Step 8: Seal the new ceiling

Seal the connection to the walls as well as all joints and penetrations with a suitable flexible sealant. The finished structure thus combines decoupling, sound absorption in the cavity, resonance damping, mass, and airtightness.


Option 2 – Sound Insulation for Ceilings Without Joists


Step 1: Prepare the existing ceiling surface

Ensure that the surface is stable, dry, and free of loose debris. Seal cracks, holes, joints, and penetrations before installing the sound insulation layers.

Step 2: Install SilentDirect Polaric

Install SilentDirect Polaric over the entire interior ceiling surface. Be especially careful around edges and corners, and ensure the solution fits tightly against surrounding surfaces.

Step 3: Seal the joints

Use SilentDirect Aluminum Sealing Tape on all seams. A continuous surface reduces the risk of sound finding easier paths through the structure.

Step 4: Install SilentDirect Neo

Then cover the ceiling with SilentDirect Neo. We recommend 4 mm or a maximum of 7 mm in this thin construction. Neo acts as a damping intermediate layer between the existing and the new ceiling.

Step 5: Install the new ceiling cladding

Install double layers of drywall, OSB and drywall, or another equivalent heavy-duty panel cladding through the previous layers and into the load-bearing structure. Check in advance that the structure can support the additional weight.

Step 6: Seal edges and penetrations

Carefully seal around the entire perimeter of the ceiling and at all penetrations. This alternative requires less height than a stud frame but typically does not provide as effective decoupling as Option 1.

Add ceiling absorbers if there is a long reverberation time

If the space still feels noisy, ceiling absorbers can be used to reduce echoes and reverberation. In industrial environments, for example, PES Ceiling Industry or PES Ceiling Deep Industry be suitable options. They improve room acoustics but do not replace the ceiling’s sound insulation.

Did you know that…

Did you know that the sound of rain on a metal roof isn’t limited to where the raindrops strike? When the thin metal sheet is set in motion, the vibrations can spread across a larger portion of the roof surface, which then acts much like a sound-radiating membrane. Loose metal sheets, fittings, and fasteners can further amplify the sound through resonance and rattling.

An effective solution therefore often combines several measures: resonance damping of appropriate metal surfaces, decoupling between building components, sound absorption in the cavity, and a heavy, tight suspended ceiling. Ceiling absorbers can also reduce reverberation in the room, but they do not replace sound insulation when the goal is to prevent rain noise from passing through the roof structure.

Featured Articles

How do you soundproof a ceiling?

How can you reduce noise and minimize structure-borne noise?

Airtightness is essential for sound insulation!

Products for sound insulation and sound absorption in metal roofs.

The products listed below serve various functions in a metal roof solution. Some reduce resonance and vibration transmission, while others add mass, seal joints, or absorb sound within the roof structure and the room. Always check for moisture, condensation, fire codes, load-bearing capacity, and fastening methods before making any changes to the roof structure.

SilentDirect Polaric is a self-adhesive barrier mat for sheet metal, metal, and hard surfaces where mass, sealing, and vibration damping need to be combined.

SilentDirect MLV is used as a heavy-duty sound barrier in ceiling structures where airborne rain noise and other noise need to be dampened.

SilentDirect Neo serves as a damping intermediate layer in thinner roof systems that do not require new framing.

SilentDirect Seal is placed between joists and adjacent building components to reduce direct contact, vibrations, and sound leakage.

SilentDirect Aluminum Sealing Tape is used to seal joints in Polaric and MLV layers, ensuring a continuous sound barrier.

SilentDirect Egg fills the cavity in a decoupled suspended ceiling and reduces resonance between the ceiling’s various layers.

PES Ceiling Industry is a robust 50 mm ceiling absorber for industrial facilities where metal ceilings contribute to rattling, echoes, and high overall noise levels.

PES Ceiling Deep Industry is a 100 mm industrial absorber for larger spaces where greater absorption depth is needed to reduce reverberation.

*Free shipping

Free shipping to a pickup location

5-year warranty

5-Year Product Warranty

Fast Delivery

Usually ships the same day

Reduce rain noise, resonance, and noise from metal roofs

A metal roof is lightweight, rigid, and durable, but the thin metal surface can be set in motion by rain, hail, wind, and vibrations. The metal sheet then acts as a large sound-radiating surface. The sound of pelting rain can therefore be heard much more clearly under a metal roof than under a heavier roofing material. How much sound reaches the room depends on the metal sheet’s profile and fastening, but also on the sub-roof, insulation, air gaps, joists, and interior ceiling cladding.

Find out where the sound is coming from

Start by distinguishing between three issues. The first is resonance and impact noise caused when rain or hail strikes the metal sheet. The second is sound transmission through the entire roof structure. The third is reverberation inside the room, which can make the incoming sound more noticeable. Sound damping of the metal sheeting itself, sound insulation of the roof structure, and sound absorption within the room serve different functions and may need to be combined.

Also check whether the metal sheeting, hardware, or fasteners are loose and causing rattling. Inspect seams, eaves, ridges, penetrations, and connections to walls. Moisture, condensation, ventilation, and the roof’s load-bearing capacity must always be assessed before materials are installed. Changes to the exterior roof should be designed by a qualified roofer or structural engineer.

Dampen resonance in the sheet metal

On dry and suitable sheet metal or metal surfaces, SilentDirect Polaric can be used to add mass and reduce vibrations. The product must be installed on an accessible, clean, and stable surface according to the product instructions. It must not be used in a way that impairs the roof’s drainage, ventilation, condensation protection, or fire safety. Seams in sound-insulating layers can be sealed with SilentDirect Aluminum Sealing Tape when the substrate and construction are suitable.

Install a decoupled, heavier suspended ceiling

When noise travels through the entire ceiling structure, a new decoupled suspended ceiling typically provides greater effectiveness than a thin sound-absorbing layer alone. SilentDirect primarily recommends a framework in which the contact surfaces are damped with SilentDirect Seal. The cavity is filled with a sound-absorbing material, such as SilentDirect Egg, and the structure is supplemented with SilentDirect Polaric and, if necessary, SilentDirect MLV to increase mass against airborne sound.

The new ceiling is constructed using heavy panel cladding, such as OSB and gypsum board or double layers of gypsum board. The panel joints are staggered, and connections, edges, and penetrations are carefully sealed. The combination of decoupling, absorption, mass, and sealing reduces the likelihood of vibrations from the metal roof being transmitted into the room.

Sound Insulation Without a Subframe

When ceiling height is limited, a thinner construction can be built without a new framing system. In this case, SilentDirect Polaric is installed over the existing interior ceiling surface, the joints are sealed, and SilentDirect Neo is used as a damping intermediate layer beneath the new heavy ceiling cladding. This solution takes up less height but typically does not provide the same decoupling as a framing system.

Absorbers improve the room but do not stop roof noise

Ceiling absorbers can reduce echo and reverberation in the space and make rain noise less intrusive. However, they do not replace a dense and heavy ceiling structure when the goal is to prevent sound from passing through the ceiling. For best results, the solution should therefore be chosen based on whether the problem lies primarily in the metal sheeting, the ceiling structure, or the room’s acoustics.